
Why Patio Jointing Compound Washes Out After Rain
Patio jointing compound can wash out after rain when the joints are too shallow, too narrow, poorly cleaned, unstable, overexposed to flowing water, or unsuitable for the product used. Rain often gets blamed first, but rainfall may only reveal a problem that was already there. The joint may not have been deep enough, the paving may have moved, or the product may not have matched the joint size and surface.
This guide is for UK homeowners, DIY patio users and trade buyers who have found loose, soft, cracked or missing patio jointing compound after rainfall. It explains what the failure may mean, how to check the joint before reapplying, when to stop and investigate the patio itself, and how to choose a better repair route.
The main risk is buying another tub of jointing compound and putting it into the same failed joint without checking why the first application failed. That can waste time, product and money. The safer approach is to inspect the joint, measure the depth and width, remove loose material, check drainage and only then choose the right compound or tool for the job.
Fast Answer Before You Buy More Compound
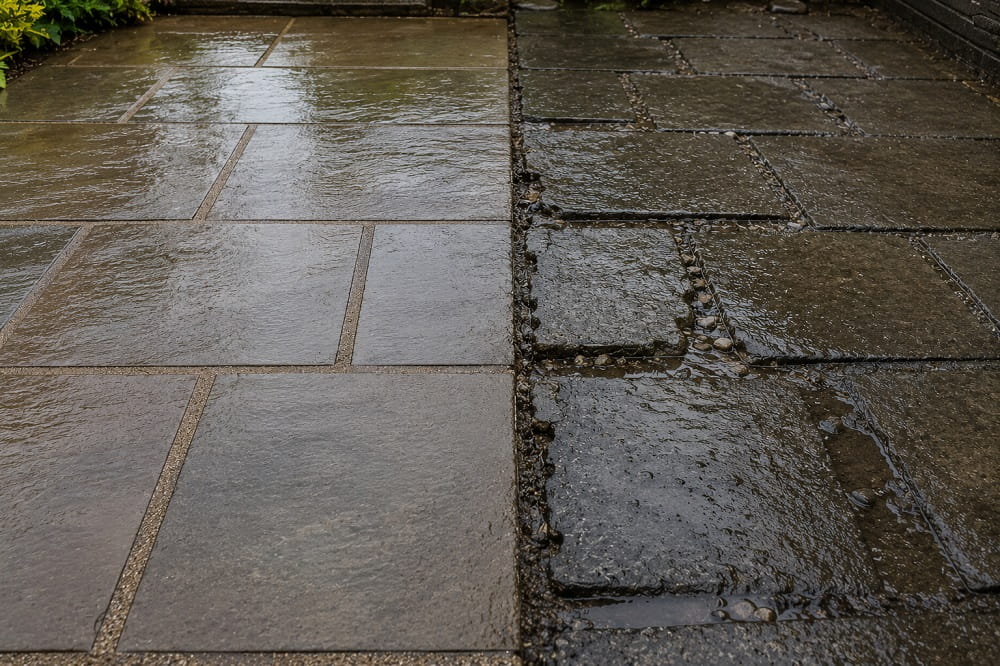
- Safest default: Do not top up washed-out patio joints until you have checked joint depth, width, cleanliness, drainage and slab movement.
- Rain is often the trigger, not the full cause: Rain can expose shallow joints, poor preparation, heavy water flow or a product that does not suit the joint.
- Loose material should usually come out: Soft, broken or contaminated jointing normally needs removing before fresh compound is applied.
- Joint dimensions matter: Many products have minimum joint width and depth requirements, so measure the joint rather than guessing.
- Moving slabs need attention first: If paving rocks, lifts or sounds hollow, the bedding or base may need repair before the jointing compound will last.
Where This Guide Stops
This guide does not replace the instructions for a specific jointing compound. Always check the current product label and data sheet before application. Product guidance can differ between brands, colours, surface types and joint sizes.
This guide also does not prove that the patio is structurally sound. If paving slabs move, the bedding has failed, water sits under the slabs, or the patio drains badly, the jointing compound may keep failing until the underlying issue is corrected.
For a broader explanation of compound types, use the paving jointing compounds guide before choosing a replacement product. This washout guide is narrower. It focuses on failure after rain, not every possible patio pointing method.
Red Flags Before Re-Jointing
Pause before re-jointing if the slabs move, the joint is very shallow, the joint is narrower than the product allows, water runs through the joint, or the same area has already failed more than once. Reapplying product without diagnosing the cause may only create another short-term repair.
Escalate the job if water is pooling against the house, the patio falls towards the building, the surface is cracked, the bedding mortar is loose, or the paving is unstable. In those cases, the problem may be drainage or construction, not the jointing compound alone.
Take care when removing old material. Joint rakes, scrapers, blades and pressure washers can damage paving if used aggressively. Wear suitable gloves and eye protection, and avoid high-pressure cleaning on delicate slabs, unstable joints or surfaces where the finish could be damaged.
Why the Joint Failed After Rain
Patio jointing compound fills the gaps between paving slabs, setts or stones. It helps create a neater surface and can reduce loose debris in the joints. It is not designed to hold loose paving in place or fix failed bedding below the slab.
When a compound washes out after rain, the cause usually sits in one or more of these areas: joint size, preparation, water movement, surface suitability, application conditions or paving movement. A good diagnosis checks all of them before another product is applied.
Shallow joints
Joint depth is one of the most important checks. If the joint is too shallow, the compound may only sit as a thin cap on top of old sand, mortar, dirt or moss. A thin cap has less grip and can break, crack or wash away more easily.
Some manufacturer guidance gives minimum joint depths. One product may require a deeper joint than another. Do not assume that a joint is deep enough because it looks open from above. Scrape out loose material and measure the usable depth.
Narrow or uneven joints
Joint width matters because the compound needs enough room to flow, settle and compact. If the joint is too narrow, the material may not enter properly. It may bridge across the top, leave voids below or fail to bond as expected.
Narrow joints are common on some modern paving layouts. Chamfered slab edges can also make the top of the joint look wider than the usable gap below. Measure the narrowest practical part of the joint, not only the visible top edge.
Poor clean-out
Jointing compound needs a clean, suitable joint. Old mortar, kiln-dried sand, soil, moss, algae, loose grit and failed compound can all weaken the repair. If the new material sits on contamination, rain and foot traffic may loosen it.
Surface cleaning is not enough if the joint below is still full. A patio can look clean on top while the joint remains shallow or unstable underneath.
Water movement
Rainfall is a normal outdoor condition, but heavy water movement can expose weak joints. Water from a downpipe, a low point, a channel, a lawn edge or a badly draining area may repeatedly flow through the same joint line.
If the same joints wash out after every downpour, watch where the water travels. The repair may need drainage attention as well as a new compound.
Moving paving
Jointing compound can crack or break away if slabs move. Rocking slabs open and close the joint under foot traffic. That movement can disturb the material and allow water in.
If the paving moves, the compound may not be the root problem. The slab support, bedding or sub-base may need checking before the joints are refilled.
Diagnosis Checklist for Failed Patio Joints
Diagnosis should happen before buying more products. Look at the failed joints, not just the missing material. The pattern of failure often points to the cause.
Check how much material has gone
If only the top layer has gone, the joint may have been too shallow or poorly compacted. If the joint is empty down to the base, the product may not have settled or may have been washed out by heavy water movement. If the material has cracked in the middle, movement or poor support may be involved.
Measure the joint
Use a thin ruler, measuring tool or suitable depth gauge to check several joints. Measure both depth and width. Do not rely on one easy corner. Measure failed areas, sound areas and any joints that sit in water.
If your measurements do not match the product’s minimum requirements, do not reapply the same product without changing the situation. The issue may be wrong product choice rather than poor application.
Check stability
Walk over the paving and listen for hollow sounds. Press gently near slab corners. Look for rocking, lifting or uneven movement. If the slabs move, the jointing material may fail again even if it is applied neatly.
Check the rainwater route
Look at the patio after rain, provided it is safe to do so. Check where water collects, where it runs and whether it crosses the failed joints. Look at downpipes, edges, channels, gullies and low spots.
Pause the repair if the joint is acting like a drainage channel. Re-jointing may hide the issue temporarily, but the same water path may break the repair again.
Choosing a Repair Route
There is no single fix for washed-out patio joints. The right route depends on why the compound failed.
Use the same product only when the cause is clear
Using the same product again may be fine if the first failure was caused by poor preparation, shallow clean-out or debris left in the joint. It is less sensible if the product did not suit the joint width, surface type or level of movement.
For basic application sequence and preparation reminders, use the patio jointing compound application guide. For a failed joint, use that guide after the failure cause has been checked.
Change the product where the joint needs it
If the joint is narrow, the paving is porcelain, the area needs a stronger system, or the finish needs more control, a different product family may be more suitable. A generic brush-in compound is not always the best option for every patio.
For brand-level differences, compare the options in the Geo-Fix and Sika jointing comparison. Use that comparison alongside the current product instructions, not instead of them.
Stop if the patio needs repair first
Stop the product decision if the slabs are loose, the bedding has failed, or water sits in the joint. This is where buying more compound can become a false economy. The patio may need lifting, rebedding, drainage correction or professional assessment before the jointing will last.
Preparing the Joint Before You Refill It
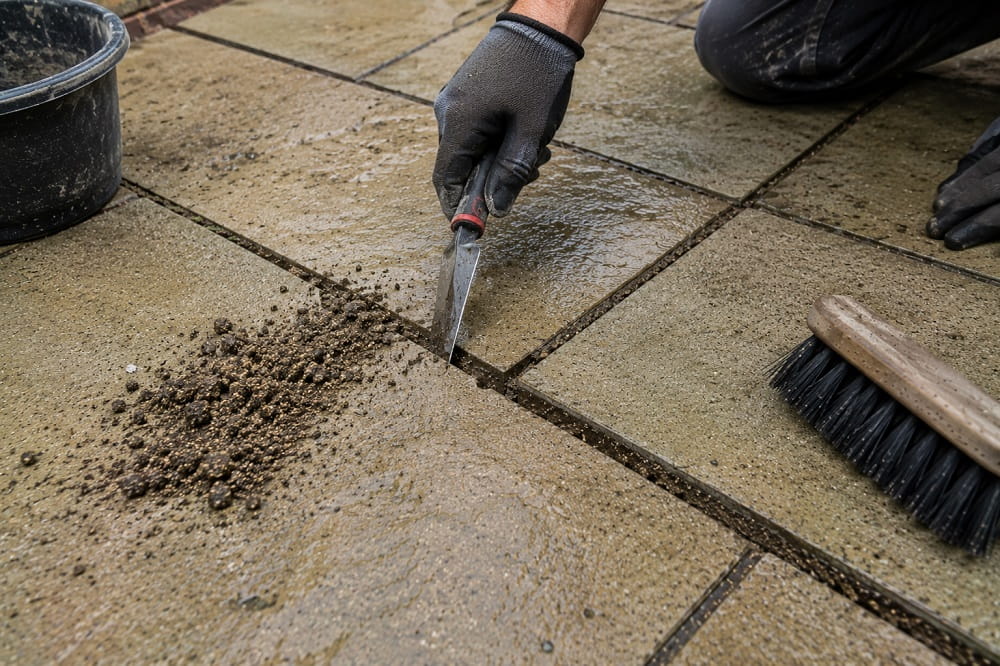
Preparation should create a joint that is clean, open and suitable for the chosen product. The steps below are not a substitute for product instructions, but they explain the checks that matter before reapplication.
Remove failed compound
Remove loose, soft, cracked or contaminated jointing material. Do not leave failed material in place and cover it with a thin layer of new compound. A thin top-up may look acceptable at first, but it can break away quickly.
Open the joint to the right depth
After loose material is removed, check the actual joint depth again. Dirt, sand and old pointing can hide how shallow the joint really is. The joint needs enough usable depth for the product being used.
Clean the joint and surface
Brush out debris and clean the surface in a way that suits the paving. Avoid harsh cleaning on delicate stone. If a cleaner is used, make sure residues are removed and the surface condition matches the product guidance before re-jointing.
Do a small test area
A test area is sensible where paving is porous, light-coloured, textured or natural stone. It helps check finish, residue and clean-down before the whole patio is treated.
Repair Mistakes That Make Washout Come Back
One common mistake is blaming the rain and buying more of the same compound. Rain may be involved, but it may not be the root cause. The joint may have been shallow, dirty, unstable or unsuitable.
Another mistake is topping up failed joints without removing loose material. This can leave a new compound sitting on weak or contaminated material.
A third mistake is cleaning only the surface. The top of the paving may look tidy, but the joint below can still be full of loose sand, moss, soil or old pointing.
Some users ignore slab movement. If a slab rocks, the joint beside it is likely to crack or open again. Jointing compound is not a bedding repair.
Another mistake is choosing by colour alone. Colour matters, but it should come after suitability. Joint width, joint depth, paving type and water exposure should be checked first.
How to Stop the Same Joints Failing Again
After re-jointing, inspect the patio after the first heavy rain. Look for soft joints, gaps, cracks, loose sections, residue and pooling water. Early issues are easier to correct than a full washout.
Keep the patio swept and clear of moss, soil, leaves and debris. Organic material can hold moisture and encourage weeds. It can also hide early joint failure.
Be careful with pressure washing. Direct high pressure into joints can loosen material, especially if the joint is already weak or the surface is delicate. Use cleaning methods that suit the paving and the jointing product.
Check drainage throughout the year. Look for low spots, blocked outlets, water running from lawns, and rainwater from roofs or sheds discharging across the patio. If water always attacks the same joints, the patio may need drainage changes, not only a new compound.
Choosing Jointing Products and Tools
Before buying, measure the joint width and depth, identify the paving type and decide whether the patio is stable. Choose the product after those checks. Do not choose only by colour, brand or the phrase “all weather”.
For broad product browsing, start with the Path & Patio pointing category. This is the main product area for patio jointing compounds, pointing materials and related tools.
If you are comparing brand families, check the Geo-Fix paving jointing range, the Sika paving and pointing products, and the Joint-It paving range. These brand pages help narrow the choice after the joint dimensions and surface type have been checked.
For a failed-joint repair, the basket may include a suitable jointing compound, a scraper or rake, a stiff brush, gloves, a bucket, and cleaning tools. If the joints are deep enough and the patio is stable, replacement compound may be enough. If the slabs move or drainage is poor, the repair may need more than a new tub of material.
Final Takeaway
Patio jointing compound usually washes out after rain because the joint, preparation, surface or drainage conditions are not right for the product. Rain can trigger the failure, but it is often not the only cause.
Measure the joint depth and width, remove failed material, clean the joint properly, check for slab movement and look at how rainwater travels across the patio. Choose a replacement compound only after those checks. This reduces wasted product and improves the chance of a lasting repair.
Frequently Asked Questions
Why did my patio jointing compound wash out after rain?
It may have washed out because the joints were too shallow, too narrow, dirty, unstable or exposed to heavy water flow. Rain often reveals preparation or suitability problems rather than being the only cause.
Can I just top up washed-out jointing compound?
You should avoid topping up over soft, loose or contaminated material. Remove the failed material first, then check the joint depth, width and stability before applying new compound.
Does rain ruin patio jointing compound?
Rain does not automatically ruin every product. Some products are designed for wet conditions, but joint depth, preparation, drainage and product suitability still matter.
How deep should patio joints be before using compound?
The required depth depends on the product. Some products state minimum joint depths such as 20mm or 25mm. Always check the current product guidance before applying.
Why is my patio pointing cracking in the middle?
Cracking can happen when the joint is too shallow, the material has not settled properly, the paving moves or the joint is exposed to stress. Check slab movement and joint depth before repairing.

Path & Patio is a UK supplier of paving and landscaping products, sharing practical guidance, product expertise and installation advice for patios, paths and driveway projects.