
Paving Jointing Compounds Explained: Types, Uses and How to Choose the Right Finish for UK Patios and Paths
Paving joints are easy to ignore until they fail. Once the joints start washing out, cracking, or filling with weeds, the whole patio or path can feel loose, untidy and high-maintenance. This guide explains what paving jointing compounds are, how they compare to traditional sand-and-cement mortar and flowable grouts, and how to choose the right finish for your specific paving in typical UK conditions.
You will leave with a practical selection framework, a clear view of the main product types, and a set of checks you can run on your patio or path before you spend money or start lifting slabs. Where it makes sense, you will also see when it is smarter to repair, re-bed or improve drainage first, because the best jointing compound in the world cannot compensate for movement underneath.
Quick answer: how do you choose the right paving jointing compound?
- Match the product to your paving type first (stone, concrete, porcelain or block paving).
- Measure joint width and depth and only use products designed for those dimensions.
- Choose permeable or non-permeable joints based on drainage and base design, not marketing claims.
- Do not use jointing compound to compensate for movement, poor bedding or drainage issues.
Who this guide is for (and when it is not enough)
This guide is intended for UK homeowners, landscapers and competent DIY users choosing or replacing jointing compounds for patios, paths and light-use driveways.
This guide does not cover:
- Structural repairs or re-laying unstable paving
- Sub-base reconstruction or drainage redesign
- Heavy vehicular load design
When to pause or seek professional advice
If paving is rocking, joints are failing repeatedly, or water regularly ponds after rain, jointing compound selection alone will not solve the problem. Base repairs or drainage correction should come first.
What Is a Paving Jointing Compound and What Does It Do?
Plain-English Definition
A paving jointing compound is a material designed to fill the gaps (the joints) between paving units such as slabs, setts, or blocks. Its job is to create a stable, durable joint that helps lock the paving in place, reduces washout of joint material during rain, and improves the finished look.
If you are comparing options on the Path and Patio site, the most relevant starting point is the patio and driveway pointing products range, because it keeps jointing options and related materials in one place.
Why Joints Matter More Than Most People Think
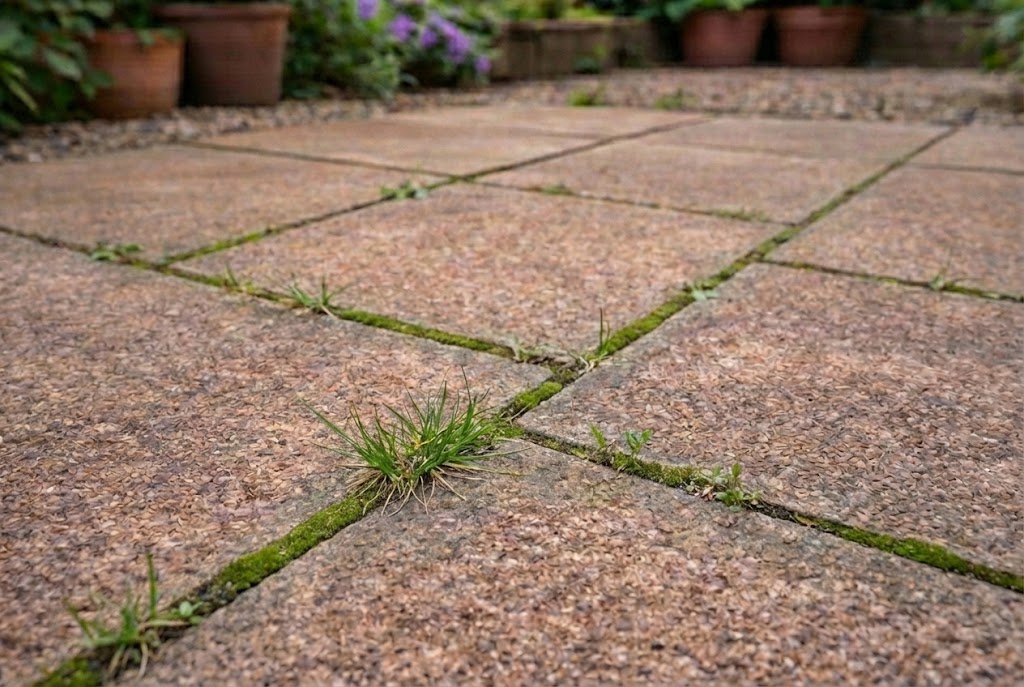
Joints are not just cosmetic lines. In a typical patio or path build-up, joints help with:
- Load sharing: When a slab is walked on, small movements and loads are distributed across neighbouring units through the joint, rather than concentrating on a single edge.
- Edge support: The joint helps reduce chipping at slab edges and corners, especially where the surface sees regular foot traffic or occasional light vehicle use.
- Water management: Depending on the product and the build, joints can either allow some drainage through (permeable joints) or shed water across the surface (non-permeable joints).
- Maintenance control: A good joint reduces washout and can slow down weed and ant activity, meaning fewer top-ups and less disruption.
Jointing, Pointing and Grouting: The Terms That Confuse DIYers
- Pointing usually means finishing a joint with a mortar (often sand and cement), shaped and compacted with hand tools.
- Jointing compound often means a proprietary product designed specifically for paving joints, commonly brush-in or sweep-in, with specific joint width and depth requirements.
- Grout is often used for flowable, cement-based compounds used in narrower joints, especially with porcelain paving where the surface is less porous and the aesthetic is more “tile-like”.
The Main Types of Joint Filling for Patios and Paths
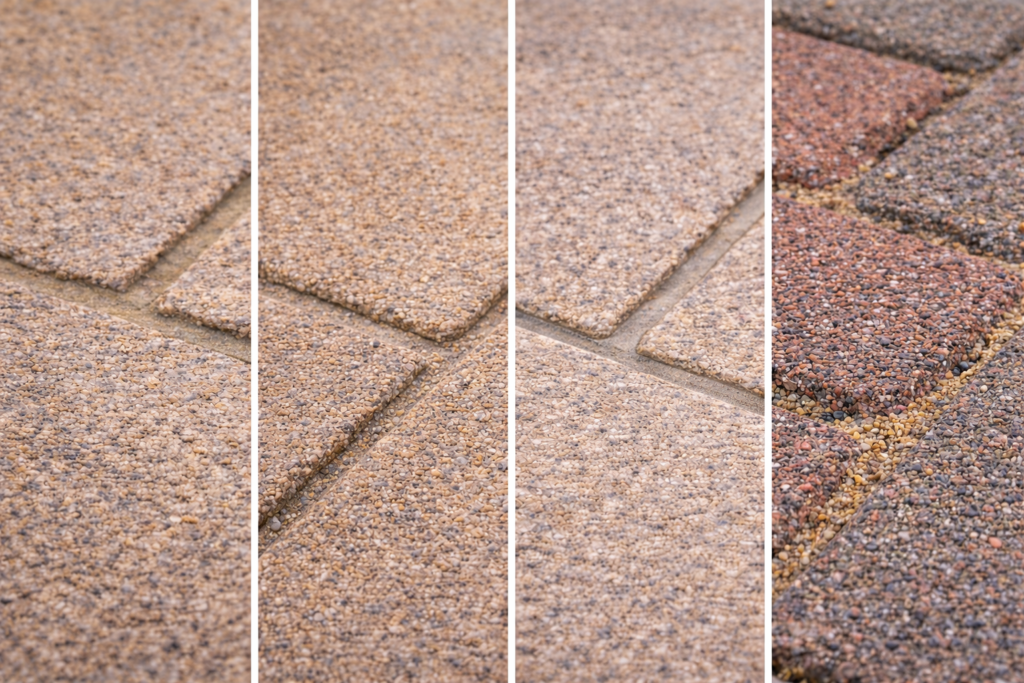
Traditional Sand-and-Cement Mortar Pointing
Mortar pointing has been used for decades and can look excellent on traditional natural stone, setts and concrete flags. When done well, it produces a firm joint and a classic appearance. However, it is labour-intensive, sensitive to mixing consistency, and more likely to crack if the sub-base or bedding is not stable. Mortar can also stain some stones if not managed carefully.
Mortar is best treated as a skilled finishing method rather than a shortcut. If you choose mortar, factor in joint preparation, careful cleaning, and realistic maintenance over time (especially in shaded or damp areas where algae and moss thrive).
Brush-In or Sweep-In Jointing Compounds (Often “All-Weather”)
Brush-in compounds are popular because they reduce mixing and can be faster to apply on larger areas. Many are supplied ready to use, brushed into the joints, compacted and finished with water as part of the installation method. These are often positioned as an upgrade from traditional mortar because they can reduce washout and provide a more consistent finish, provided the base and joint dimensions are suitable.
In practice, most people choose within a small set of reputable ranges. If you want to compare common brush-in options without overcomplicating the choice, start with either the Geo-Fix paving jointing compounds selection or the Sika paving and construction solutions range, then choose products suitable for your paving type and joint size.
These products are not all the same. Some are designed to remain permeable, letting water pass through the joint, while still setting hard. Others are more focused on strength and a tighter finish. Always match the product to the joint width, depth and paving type, and do a small test area if your stone is porous or colour-sensitive.
Flowable Cement-Based Jointing and Grouting Compounds (Common for Porcelain)
Porcelain paving often uses narrower, more uniform joints and a cleaner, modern aesthetic. Flowable jointing compounds are designed to be mixed with water and applied as a slurry or flowable grout that fills joints efficiently. The goal is a neat joint, strong adhesion within the joint cavity, and a finish that does not depend on the surface porosity of the paving.
These grouts tend to be less forgiving of poor preparation. They typically require stable paving, properly cleared joints, and careful cleaning of residue during application to avoid a cement film on the tile surface.
Jointing Sand and Stabilised Sand (Mostly for Block Paving)
If you are working with block paving rather than slabs, jointing sand is still common. It is swept into joints and compacted so the blocks interlock. In some situations, sand can be stabilised using a suitable joint sealant to reduce sand loss. This approach is structurally important for block paving, but it is not the same as jointing compounds designed for larger paving joints on patios.
How to Choose the Right Jointing Option: A Practical Decision Framework
Step 1: Identify Your Paving Type and Its Sensitivity
Start by naming what you actually have, because the “best” jointing compound depends heavily on the surface and how it behaves:
- Porcelain paving: Low porosity, crisp edges, often narrower joints. Usually paired with cement-based flowable jointing compounds designed for porcelain.
- Natural stone (sandstone, limestone, slate): Often porous and colour-variable. Needs careful product selection and cleaning to avoid haze or staining.
- Concrete flags: More uniform but still can mark. Often works with mortar or brush-in compounds if joints meet requirements.
- Block paving: Typically relies on jointing sand and compaction for interlock, though there are also specialist compounds for wider joints in some designs.
Step 2: Measure Joint Width and Depth Properly
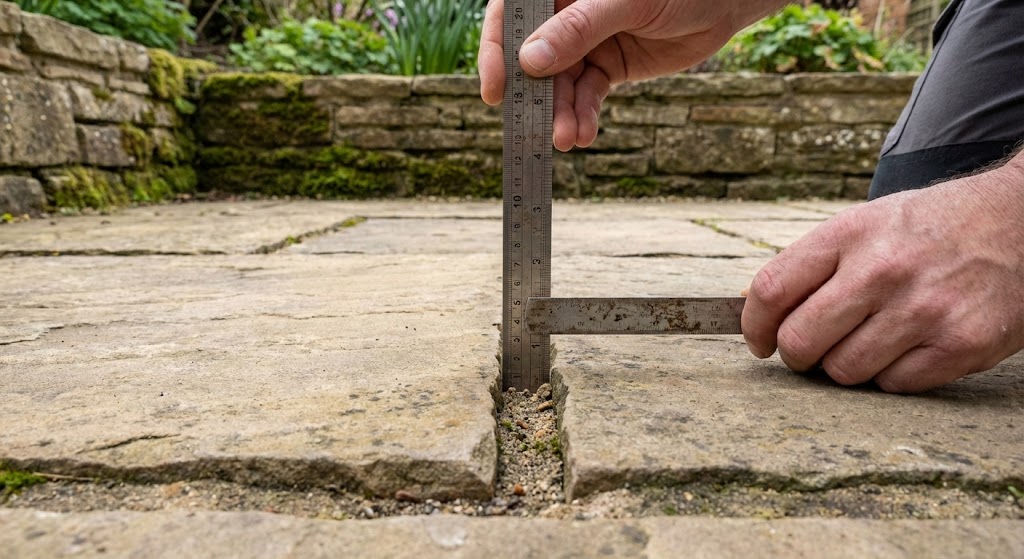
Jointing compound performance is tied to geometry. Measure:
- Width: Use a ruler or calipers at several points. Do not assume the top width equals the bottom width. Some slabs are chamfered, creating a wider opening at the top but a narrow throat lower down.
- Depth: Probe the joint with a thin tool. You need a consistent depth of sound, clean joint cavity. If the joint is only partially filled or contains loose bedding, you will not get a reliable finish.
If you cannot achieve the minimum depth and width stated by the manufacturer, treat that as a stop sign. Either pick a different product type or plan to rework the joints.
Step 3: Decide Whether You Want a Permeable or Non-Permeable Joint
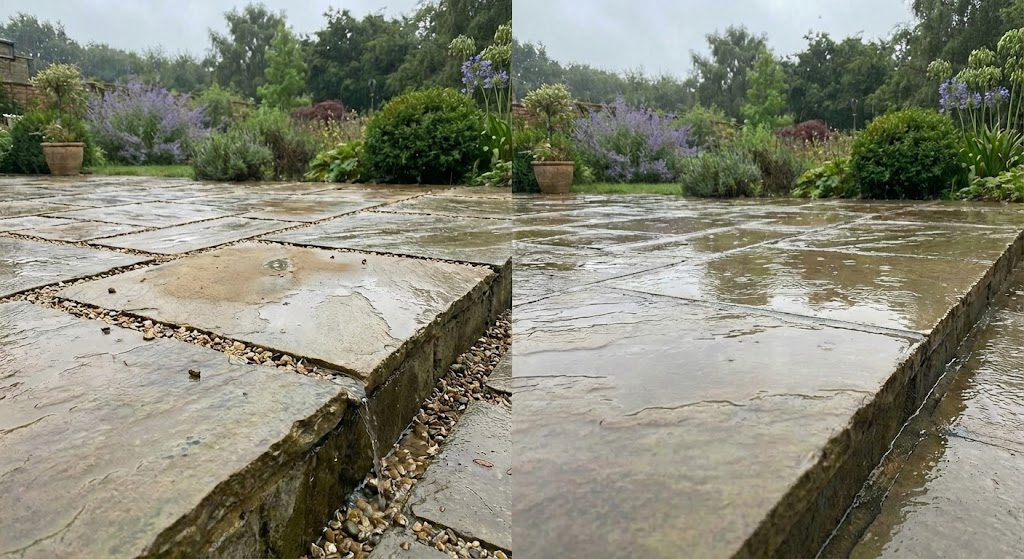
This is a decision many people skip. In practice:
- Permeable joints can help reduce surface water pooling because some water can pass through the joints. The trade-off is that fine dirt can collect at the top surface over time as water drains, so cleaning is part of ownership.
- Non-permeable joints shed water across the surface. They can be useful where the base is not designed for permeability, but they still rely on the patio having a proper fall and drainage path.
If your patio regularly ponds after rain, do not assume a different jointing compound will fix it. Standing water usually points to an issue with falls, levels or drainage.
Step 4: Match the Product to Traffic and Movement Risk
Think about how the surface is used:
- Light foot traffic: Most patio jointing approaches can work if preparation is correct.
- Regular furniture movement, wheelie bins, barbecues: Prioritise a joint that is robust and well-compacted, and check whether the product is suitable for the joint width and paving type.
- Driveways or light vehicular traffic: Use products explicitly rated for that use and make sure the sub-base is built for vehicle loads. A patio base is rarely enough for regular vehicles.
Understanding Joint Finishes: Colour, Profile and How “Protective” the Joint Really Is
Colour Choice: Match, Contrast or Blend?
Joint colour changes the entire feel of a patio. A close match makes the surface read as a single field of stone. A contrast highlights the pattern and can look more modern. The practical point is that lighter joints tend to show dirt faster, especially where the joint is permeable and fine particles collect at the surface.
Joint Profile: Flush, Recessed or Slightly Proud?
For patios and paths, a flush joint (level with the paving surface) is common because it is easier to clean and looks crisp. A slightly recessed joint can look traditional, but it may hold more water and debris, especially in shaded corners. A proud joint (higher than the paving surface) is usually avoided because it can chip and catch on cleaning tools.
What “Weed-Resistant” Usually Means in Real Life
Many jointing products aim to inhibit weed growth by setting hard and limiting the space for weeds to take root in the joint itself. That helps, but it does not guarantee a weed-free patio forever. Wind-blown seeds can germinate in surface dirt that collects in corners, along edges, or in joints that stay damp. Treat weed resistance as a reduction in maintenance, not an elimination of maintenance.
Pre-Flight Checks: Assess Your Patio or Path Before Choosing a Compound
Check 1: Is the Paving Stable Underfoot?
Walk the area slowly. If slabs rock, shift or sound hollow, jointing is not your first job. Jointing compound cannot compensate for movement. You will get cracking, crumbling joints or pop-out over time. Fix the bed first by lifting and re-bedding unstable slabs, then joint once everything is solid.
Check 2: Are Joints Clean and Deep Enough for the Product You Want?
Old mortar, algae, loose sand, organic material and dust all reduce bond and cohesion. You need a joint cavity that is clean and dimensionally consistent. If you are renovating, plan time for raking out and cleaning, not just sweeping a new compound over the top.
Check 3: Does the Site Drain Properly?
After rain, look for ponding and for damp patches that never dry. These can indicate poor falls, blocked drainage routes, or a base that holds water. Jointing compounds often need the base to drain effectively. If water cannot get away, curing can be slow and long-term durability can suffer.
Check 4: Are There Edge Restraints and Good Borders?
Edges matter. Without strong edging, paving can creep outward over time, opening joints and stressing the jointing material. If your patio has soft edges that move, consider improving the edging before investing in premium jointing products.
Application Principles That Make or Break Jointing Compounds
Preparation Is Not Optional
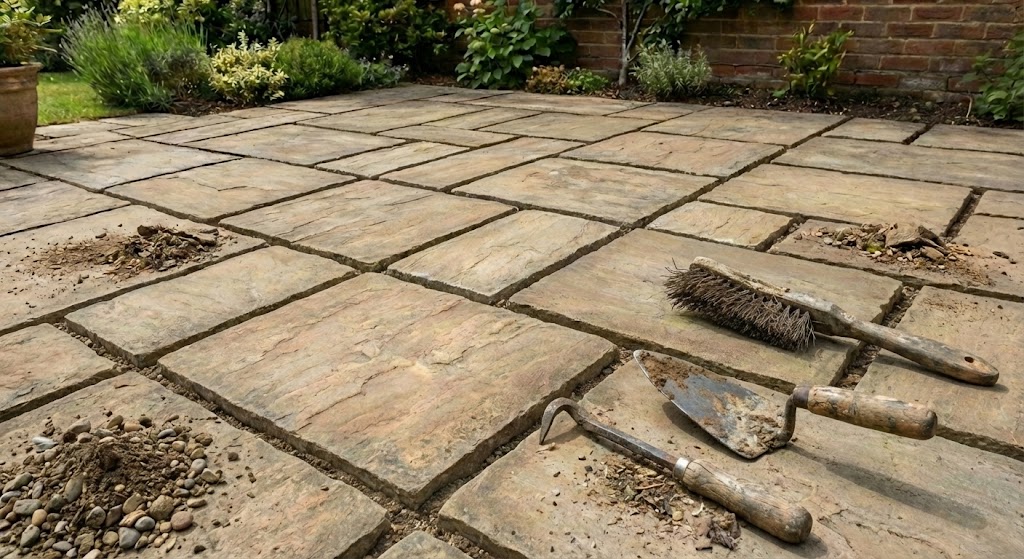
The most common reason a joint fails early is that the joint cavity was not prepared to suit the product. Preparation typically includes:
- Removing loose or failed joint material down to a stable depth.
- Clearing weeds, roots and organic growth.
- Cleaning the paving surface so residues do not stain or haze the slab.
- Confirming you can meet the minimum joint width and depth.
Fill the Joint Fully and Compact Properly
Whether you use sand, mortar or a brush-in compound, the joint must be filled to full depth and compacted. Hollow voids leave weak spots where water and frost can attack. With brush-in compounds, compacting with a pointing tool is a common step that improves strength and appearance.
Water and Weather: Follow the Method, Not Your Instincts
Some compounds are applied into wet joints and use water as part of the working method. Others need dry conditions, or at least a controlled, staged wetting process. Do not assume that “all-weather” means “ignore the forecast”. Rain at the wrong time can still damage an uncured joint or wash residues across porous stone.
Tooling Matters More Than the Tub Label Suggests
Even “easy” compounds benefit from the right tools. A soft broom, a small hand brush, a pointing trowel or jointing iron, and basic cleaning tools reduce mistakes and speed the job. If you need purpose-built tools, keep your selection tight and specific rather than buying everything “just in case”.
For patios and paths where you want a professional finish, start with the essentials from contractors and professional tools rather than improvised substitutes that can mark the paving or leave joints uneven.
Common Joint Failures and How to Prevent Them
Washout and Erosion After Heavy Rain
If joint material disappears after rain, the usual causes are insufficient compaction, shallow joints, poor drainage under the paving, or using a product outside its recommended joint size. The fix is rarely “add more on top”. The durable fix is to clean out loose material and rebuild the joint properly to the required depth.
Cracking, Flaking or “Popping Out” After Frost
Frost-related failure often points to water sitting in or under the joint, then freezing and expanding. Improving drainage and ensuring full joint depth are as important as the jointing material itself. Also check that joints are not tapered in a way that prevents the compound from being held in place.
Staining or Haze on Natural Stone
Porous paving can show residues. Common triggers include leaving compound on the surface too long, applying on paving that is damp internally, or overworking the product at slab edges. The practical safeguard is a small test area, strict cleaning discipline, and keeping to manageable sections rather than trying to joint a whole patio in one go.
Weeds Returning Despite a “Weed-Resistant” Product
If weeds reappear, look at where they are growing. If they are rooting in cracks within the jointing material, the joint may not have cured properly or may be breaking down. If weeds are sprouting from surface dirt, the fix is routine brushing and spot removal, not necessarily re-jointing.
How Jointing Choices Affect Long-Term Patio and Path Performance
Jointing Is Part of the “Protection System”, Not the Whole System
A good joint helps keep the paving stable and reduces water-driven erosion, but it is not a full protection strategy on its own. Protection also includes drainage, regular cleaning and, in some cases, sealing.
When Sealing Is Relevant (and When It Is Not)
Sealers can help reduce staining and make cleaning easier, but they need to be chosen carefully. The right sealer depends on your paving type, the look you want (natural, matt, wet look), and whether you need breathability. Sealing also has timing constraints, because the paving and joints need to be properly cured and dry.
If sealing is on your roadmap, use a dedicated reference such as guide to patio and driveway sealers to match the sealer to the surface and to avoid locking moisture into the system.
Routine Maintenance That Keeps Joints Looking Good
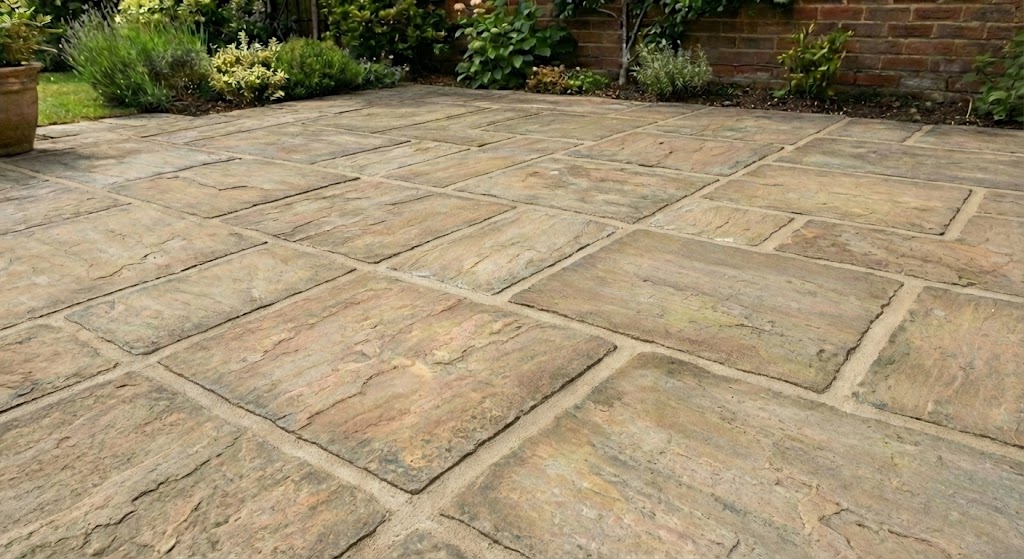
- Sweep regularly: Removes organic debris that feeds moss and weeds.
- Clean gently first: Use the least aggressive method that works before reaching for high pressure cleaning.
- Inspect after winter: Look for small voids or edge gaps early and top up or repair before water ingress expands the problem.
What to Buy: A Focused Checklist
Start with a Short Shortlist, Not a Catalogue
At this point you should know which category you need (mortar, brush-in compound, porcelain grout, or block-paving sand). Keep the shortlist to two or three product candidates that match your joint geometry and paving type. If you find yourself choosing between ten options, you have skipped the measurement step.
Plan Quantities Using Real Measurements, Not Guesswork
Coverage claims depend on joint width and depth, and on paving size. Before ordering:
- Measure the typical joint width and depth in several locations.
- Estimate the total joint length across your patio or path (a quick sketch helps).
- Compare your measurements to the manufacturer’s stated joint size requirements and coverage assumptions.
- Add a contingency for repairs and for areas with slightly deeper or wider joints.
This is the point where a “cheap” option often becomes expensive. If your joints are deeper or wider than expected, you will run short and risk patchy colour matching.
Keep Tools Minimal but Correct
The most common tool-related mistake is trying to joint with a single stiff broom and no proper pointing tool. For most brush-in and mortar jobs, a compacting tool, a soft brush for finishing, and basic cleaning equipment are the difference between a neat finish and a stained mess.
If you also need related maintenance products, such as cleaners, sealers or repair mortars, browse our patio and driveway products category to find compatible options in one place.
Summary
Jointing compounds are not interchangeable. The right choice depends on paving type, joint size, drainage and how the surface is used. Treat jointing as part of a wider system: stable bedding, correct joint geometry, disciplined preparation and realistic maintenance. If you get those fundamentals right, a good jointing compound can dramatically reduce washout, tidy the appearance and lower ongoing weed and dirt problems. If you ignore them, even premium products will fail early.
Frequently Asked Questions
What is the biggest mistake people make with paving jointing compounds?
Skipping preparation. If joints are shallow, dirty or unstable, the compound cannot form a durable, fully compacted joint and failure shows up quickly.
Do “all-weather” jointing compounds really work in UK rain?
Some products are designed to be applied in wet conditions, but the method still matters. Always follow the manufacturer’s approach and protect uncured joints from heavy washout.
Can I use a brush-in compound on porcelain paving?
Not always. Porcelain often requires porcelain-specific flowable jointing compounds. Always check product compatibility and joint size requirements before buying.
Will jointing compound stop weeds permanently?
Jointing compounds usually reduce weed growth by limiting space for roots, but they do not stop wind-blown seeds settling in surface dirt. Routine sweeping and spot removal are still required.
Should I seal my paving before or after jointing?
It depends on the paving type and jointing method. Many systems are sealed after jointing and full cure, while some sensitive stone may be sealed beforehand to reduce staining risk. Use a sealer-specific guide to plan the correct sequence.

Path & Patio is a UK supplier of paving and landscaping products, sharing practical guidance, product expertise and installation advice for patios, paths and driveway projects.