
Weedkillers, Jointing Choices and Mechanical Tools
Weeds in paving joints are not just an eyesore. They can trap moisture, encourage algae, and make walkways slippery. The good news is that you rarely need a single “magic” product. The best results come from an integrated approach: remove the weeds, clear the debris they root into, repair the joints, and keep the surface clean so seeds cannot re-establish.
This UK-focused guide explains the main weed control methods for patios, paths, block paving and driveways. You will learn when mechanical removal is enough, when a weedkiller is justified, how jointing and sealing choices affect regrowth, and how to build a simple maintenance routine that keeps hard surfaces tidy without constant re-treatment.
Quick answer: what is the most effective way to control weeds in paving?
- Remove existing weeds and the debris they grow in.
- Repair joints so dirt and moisture cannot collect.
- Use weedkiller only for persistent re-sprouting weeds.
- Prevent regrowth with regular brushing and joint maintenance.
Who this guide is for (and when weed control is not enough)
This guide is written for UK homeowners and DIY users dealing with weeds on patios, paths, block paving and domestic driveways.
This guide does not cover:
- Structural paving failures
- Sub-base or drainage reconstruction
- Full landscaping redesign
When to look beyond weed control
If joints repeatedly fail, slabs move, or water pools after rain, surface treatments alone will not deliver a lasting fix.
Quick Start: A Practical 7-Step “Reset” For Weed-Free Paving
If you want a reliable result without overthinking it, use this sequence. The later sections explain the “why” and the options.
- Pick your timing: aim for a dry spell with a couple of rain-free days. Avoid windy conditions if you plan to spray.
- Remove the bulk growth: pull, scrape or brush weeds out of joints. Bag the waste so seeds are not dropped back onto the surface.
- Deal with deep-rooted weeds: for dandelions and other taproots, use a puller tool or repeat cutting at the base until the plant weakens.
- Clear the “weed compost”: scrub out soil, moss and leaf litter from joints. Weeds mostly root in this debris, not through the sub-base.
- Choose your control method: use non-chemical controls for light growth, and reserve weedkiller for persistent, re-sprouting weeds.
- Repair the joints: top up kiln-dried sand on block paving, or re-point with a suitable jointing product where joints have opened up.
- Prevent regrowth: brush regularly, keep edges tight, and consider a suitable sealant where it makes sense for your surface and drainage.
Why Weeds Keep Coming Back On Hard Surfaces
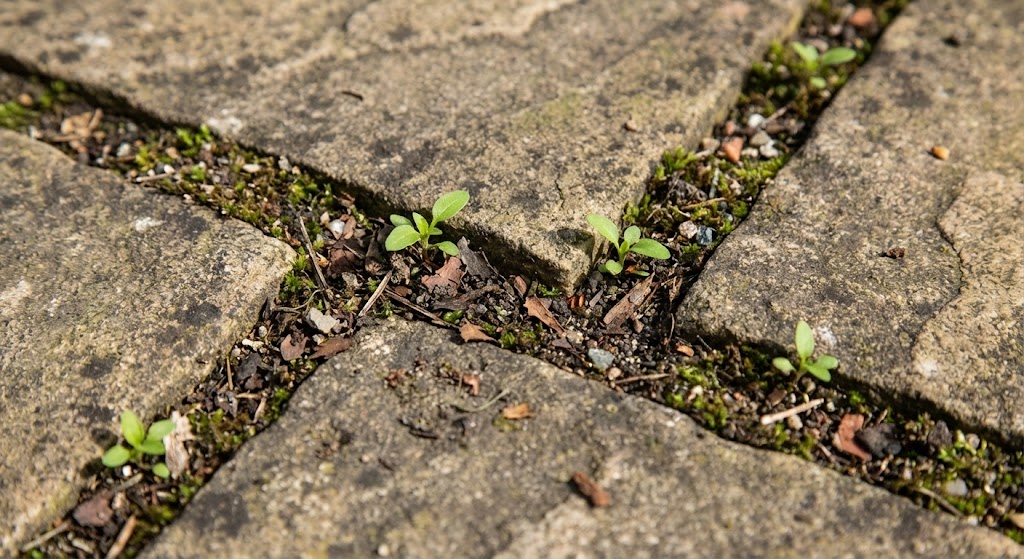
Most “Paving Weeds” Start As Seeds On The Surface
A common misconception is that weeds are “coming up from underneath”. The RHS guidance on weeds on hard surfaces explains that many are blown in as seed and establish in cracks and joints. In practice, this means the “soil” for weeds is often the fine debris trapped on top of the paving, especially in joints.
If joints are full of silt, decomposed leaves, compost spilled from pots, or general detritus, you have effectively created a narrow planting bed between slabs. This is why quick fixes that only scorch the top growth can look good for a week, then fail. If the joint remains dirty and open, new seeds will always arrive.
Edge Creep And “Invasion” From Lawns And Borders
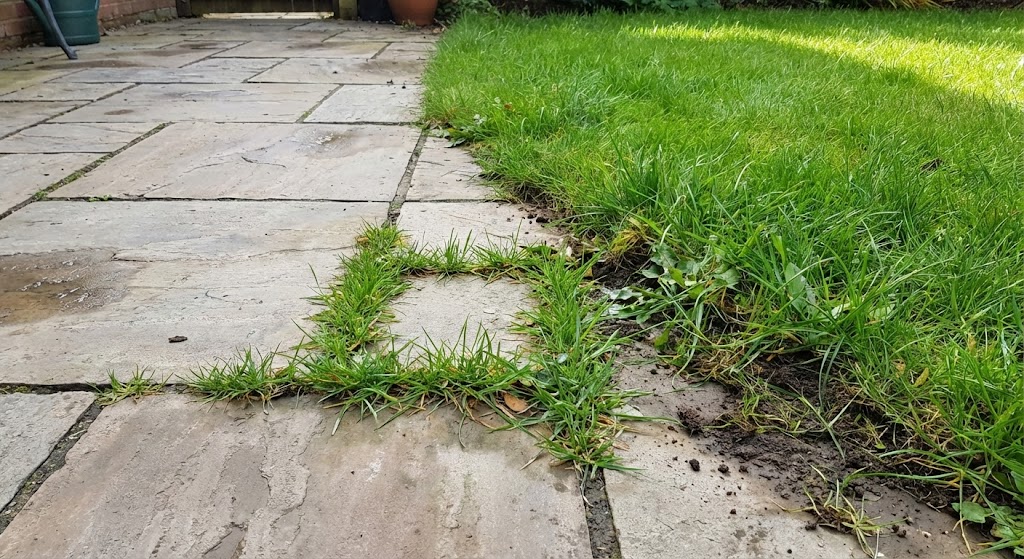
Some weeds spread by creeping stems from adjacent grass or beds. If your paving sits flush with turf, or you have a thin strip of soil at the edge, you may see plants creeping into joints. In these cases, edging and trimming matter: keep edges tight, trim grass back, and prevent soil from washing onto the paving.
Moisture, Shade And Joint Failure Make The Problem Worse
Shady, damp areas and poorly draining corners create ideal conditions for moss and algae, which then hold moisture and trap more debris. Jointing that has washed out or cracked also creates deeper voids where roots can anchor. A weed problem that always comes back in the same corner is usually a moisture and debris problem first, not a “stronger weedkiller” problem.
Choose The Right Weed Control Method For Your Situation
Think In Three Layers: Remove, Repair, Prevent
Weed control on paths and driveways works best when you treat it as a system, not a single product choice:
- Remove: take out existing weeds using mechanical, heat-based or chemical methods.
- Repair: restore joints and edges so there are fewer places for seeds and debris to settle.
- Prevent: keep the surface clean and brush it regularly so seedlings never get established.
Do You Actually Need To Remove Every Weed?
In many gardens, small weeds in low-traffic joints are more of an aesthetic issue than a functional one. Some people deliberately allow low-growing plants to soften hard landscaping and support wildlife. The practical line is safety: if weeds are making the surface uneven or slippery, control them. If they are in a non-walked edge strip, you can decide whether the time and chemicals are worth it.
A Simple Decision Matrix
| Situation | Best first move | When to escalate |
|---|---|---|
| Light seedlings in joints; you can pull them easily | Brush or scrape and sweep up debris | If regrowth appears within 2 to 3 weeks, clean joints more thoroughly and top up jointing |
| Deep-rooted weeds (dandelion, dock) in narrow joints | Use a weed puller where possible; otherwise cut repeatedly at the base | If it keeps resprouting, consider a targeted systemic weedkiller applied carefully |
| Block paving with washed-out sand and scattered weeds | Remove weeds, then resand once joints are clean and dry | If weeds return quickly, improve brushing routine and consider a suitable sealant |
| Driveway or patio is slippery with moss and algae | Clean first using a brush and suitable cleaner, then address weeds | If shade and damp persist, adjust drainage or airflow and maintain seasonally |
| Large area, constant regrowth, or weeds rooted under edging | Combine mechanical removal with repair of edges and joints | Consider refurbishment if levels, drainage or jointing are failing |
Non-Chemical Weed Control: The Methods That Work In Practice
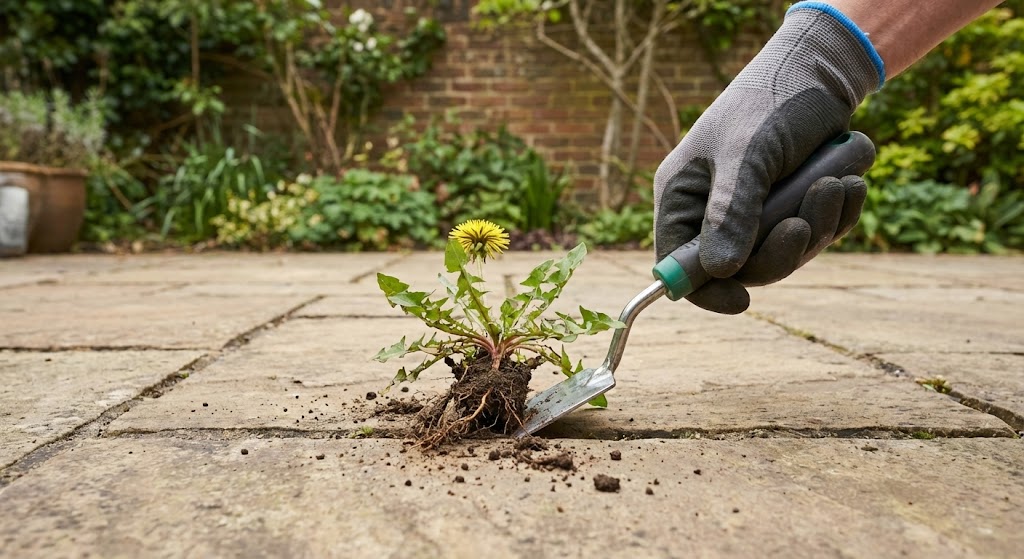
Joint Scrapers, Weeding Knives And Paving Brushes
For most patios and paths, the fastest and cleanest result comes from simple hand tools. If you prefer to avoid chemicals, the RHS non-chemical weed control advice is a useful reference for hand removal and suppression methods. A weeding knife or joint scraper severs roots and lifts growth out of cracks. A paving brush (often with stiff or wire bristles) then removes seedlings, moss and debris from the joint.
Technique matters more than strength. Work along the joint, not across it, and avoid gouging soft stone or widening the gap. On block paving, expect to remove some jointing sand while you weed. That is normal, but it needs to be replaced once the surface is clean.
Hot Water And Heat-Based Options
Boiling water can be effective on small areas when applied directly to the target plant. It works by destroying plant cells, but it does not provide any lasting prevention. Treat it as a quick knockback, then follow up by cleaning joints and improving prevention. Be cautious around surrounding planting and pets, and avoid splashing.
Flame guns and electric heat weeders can also be effective, but they require strict safety discipline. Use them only in calm conditions, keep clear of dry leaf litter, and never use near flammable fencing, sheds, fuel stores or mulch. On resin-bound or bitumen-based surfaces, heat can cause damage or softening, so check suitability first.
Brushing And Sweeping: The Underrated Prevention Method
Regular brushing sounds too simple, but it is one of the most effective long-term strategies. Brushing removes the fine debris that seeds need to germinate, and it breaks up tiny seedlings before they root. If you do nothing else, keep a stiff broom accessible and sweep hard surfaces after mowing, trimming, potting or autumn leaf drop.
Gravel Paths: Hoeing And Surface Management
On gravel, weeds often root in the top layer where organic matter accumulates. Hoeing just below the surface can cut annual weeds quickly. Then rake to keep the gravel level and prevent thin areas where weeds are more likely. If gravel is constantly mixing with soil from borders, consider edging to separate materials and reduce contamination.
Using Weedkillers Responsibly In The Uk
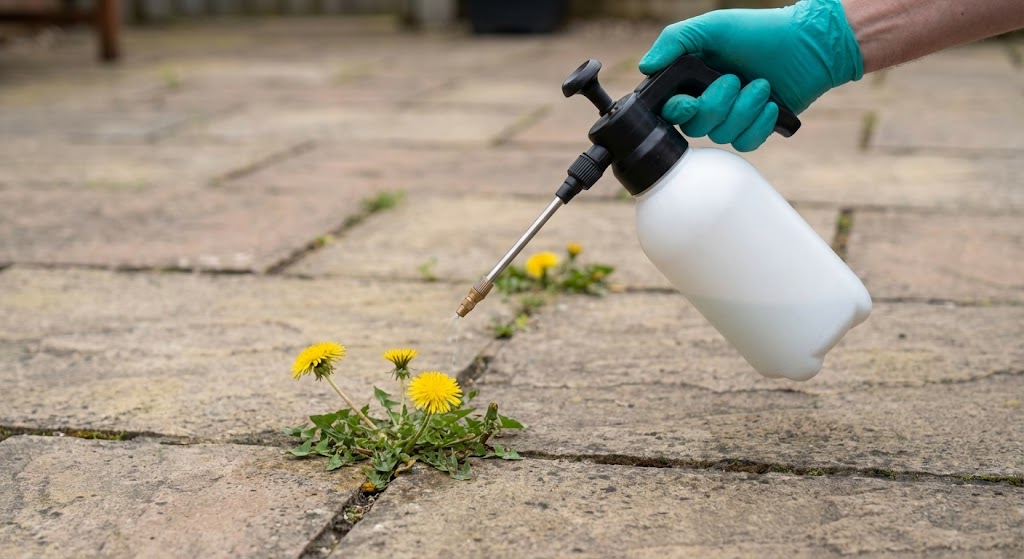
Understand What “Weedkiller” Actually Means
Weedkillers used in gardens are typically classed as plant protection products (PPPs). The HSE guidance for home and garden users explains what PPPs are and why authorised products matter. If you choose to use a weedkiller, treat the label as your method statement: it tells you where you can use the product, how much to apply, what personal protection to wear and what environmental precautions are required.
When Weedkiller Is Justified
Weedkiller is useful when mechanical removal is impractical or when weeds repeatedly re-sprout from roots in inaccessible joints. It is also useful as part of a refurbishment process: for example, you may treat persistent growth, wait for die-back, then clean and re-joint. The aim is not to spray routinely. The aim is to eliminate existing weeds so prevention can take over.
Contact Vs Systemic Weedkillers (And Why It Matters)
Not all weedkillers work the same way:
- Contact weedkillers damage the plant parts they touch. They can work quickly on small annual weeds but may not kill established roots.
- Systemic weedkillers are absorbed and move through the plant, which can improve control of deep-rooted perennials. They usually take longer to show results.
This matters because many hard-surface weeds are small but persistent. If you only scorch the top growth, the root can re-sprout. If you decide to use a systemic product, application conditions become even more important because the plant needs to be actively growing for uptake.
Practical Application Rules That Prevent Most Problems
- Choose the right day: avoid wind (spray drift), heavy rain (wash-off) and drought-stressed weeds (poor uptake).
- Keep it on target: use a coarse spray, low pressure, and treat only the weeded area.
- Protect plants and lawns: shield borders, do not spray near desirable plants, and avoid run-off onto soil.
- Do not “double dose”: applying more than the label rate does not make it work better and can increase risk.
- Never pour leftovers down drains: mix only what you need and follow label disposal instructions.
Buying And Using Legal Products
For domestic users, the simplest rule is: buy from reputable UK retailers and check the label looks complete and professional. Authorised products carry an approval or registration number and specify where they may be used. If a product is not clearly labelled for UK use, avoid it. If you already have an old product in the shed, check whether it is still authorised and within any use-up period.
Glyphosate: What It Means For Household Weed Control
Many systemic hard-surface weedkillers have historically used glyphosate. Regulatory status can change over time. In Great Britain, the competent authority has extended the approval period while renewal assessment continues. For householders, this reinforces the point that you should rely on the current product label and buy authorised UK products, rather than trying to source “stronger” products online.
Jointing Choices That Reduce Weed Regrowth
Why Joint Condition Is The Biggest Predictor Of Regrowth
If joints are partially empty, cracked or uneven, they catch debris and hold moisture. Weeds commonly establish in this trapped detritus rather than in the jointing material itself, which is why repeated weed killing often fails. If joints remain open and dirty, the problem returns. The single most effective prevention step after removing weeds is to restore joints properly so debris and moisture cannot accumulate.
Block Paving: Resanding Properly
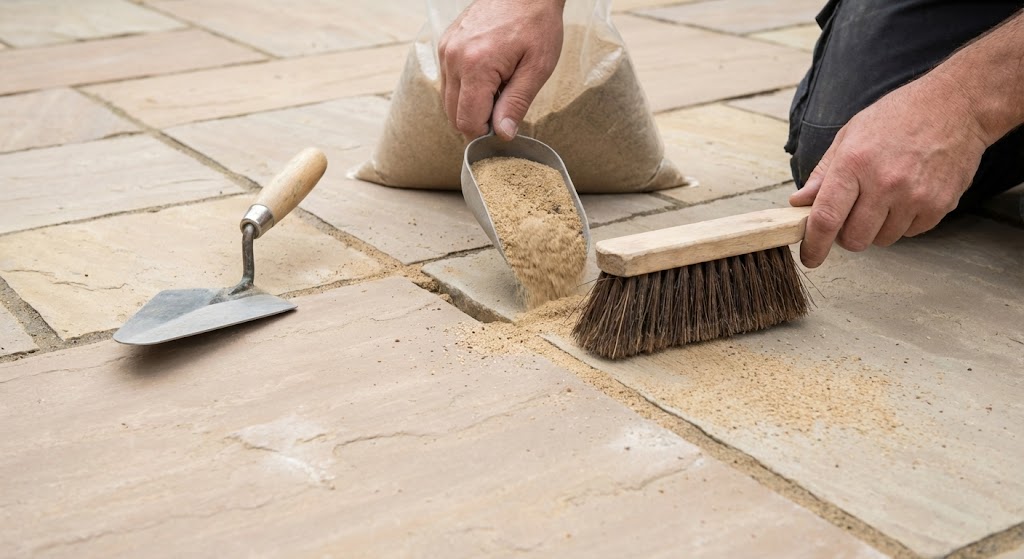
On block paving, jointing sand helps lock blocks together and stabilise the surface. When you remove weeds or clean the surface, sand is often pulled out with roots or washed out by aggressive jet washing. Once joints are clean and completely dry, brushing kiln-dried sand into the joints and compacting it back in makes a noticeable difference to stability and weed resistance.
If you resand but weeds return quickly, it is usually because debris is still present in joints or because the surface is not being swept often enough to prevent seed germination. Revisit the cleaning step and improve your brushing routine.
Patios And Slabs: Jointing Compounds And Pointing Repairs
On patios, jointing compounds can be an easier alternative to mortar pointing in many situations, especially for DIY projects. The key is selecting a product suitable for your joint width, joint depth and paving type, then applying it on a clean, correctly prepared surface. If joints are already cracked or missing material, repair them before worrying about treatments like sealing.
Polymeric Sands: What They Do Well (And What They Do Not)
Polymeric sands are designed to set within the joint and resist wash-out compared to ordinary sand. They can reduce the amount of detritus that sits in joints and make it harder for seedlings to establish. However, they are not a permanent “weed proof” guarantee. If fine debris builds up on top of the surface, weeds can still root in that layer. They work best as part of a system that includes regular sweeping.
Sealing: Helpful Tool, Not A Substitute For Maintenance
What A Sealant Can Realistically Do
A good quality sealant can make it harder for weeds to settle into the jointing and can help reduce staining. It can also make routine cleaning easier because dirt is less likely to lodge in surface pores. However, no sealant can prevent the build-up of debris on top of paving. If you allow detritus to accumulate, weeds will germinate in it regardless of the sealant.
When Sealing Makes Sense
Sealing is usually most worthwhile when your priority is surface appearance and ease of cleaning, or where you want to help stabilise jointing sand on block paving. It is less suitable where drainage is already marginal, or where the surface needs to remain highly permeable. If you are unsure, start with a stronger maintenance routine and only seal once you are happy that the surface is stable and clean.
Step-By-Step: Deep Clean And Weed Prevention Routine For Patios, Paths And Driveways
Step 1: Inspect And Define The Problem
Walk the surface and take notes. Are weeds scattered evenly, concentrated in damp corners, or mainly at edges? Are joints missing material? Are there signs of sinking blocks, loose slabs or water pooling? If you have structural issues, you may need repair work before any treatment will last.
Step 2: Remove Weeds And Bag The Waste
Start with mechanical removal. Scrape joints, pull what you can, and brush away the surface layer. Bag the waste rather than composting if it is full of seeds. The goal is to remove as much plant matter as possible before you clean.
Step 3: Treat Persistent Weeds (Only If Needed)
If you have deep-rooted weeds that re-sprout, decide whether you can physically extract the root. If not, a carefully applied weedkiller may be justified. Apply only to the target weeds and follow the label for dilution, application rate and re-entry guidance. Then allow time for die-back before you proceed.
Step 4: Clean The Surface Without Destroying Joints
Cleaning is where many DIY jobs go wrong. Over-aggressive pressure washing can strip jointing and create bigger gaps for seeds and debris. The RHS patio cleaning checklist cautions that pressure washing may damage loose stones and cause waterlogging. Start with a stiff brush and soapy water or a suitable patio cleaner, and rinse with controlled water flow rather than blasting joints directly. If you do use a pressure washer, keep the pressure low, keep the nozzle moving, and avoid firing water directly into joints.
Step 5: Clear Joints Down To Sound Material
Once the surface is mostly clean, focus on the joints. Remove remaining debris and loose jointing so the joint can be refilled properly. On block paving, a joint that looks “full” can still contain silt. If it feels soft or muddy, it needs more cleaning.
Step 6: Refill Or Re-Point Joints
For block paving, brush in kiln-dried sand in dry conditions and compact it in. For slab patios, use a jointing compound or suitable pointing repair method matched to the surface and joint dimensions. Follow product instructions closely, including any requirements for pre-wetting, curing and cleaning residue.
Step 7: Prevention And Maintenance Schedule
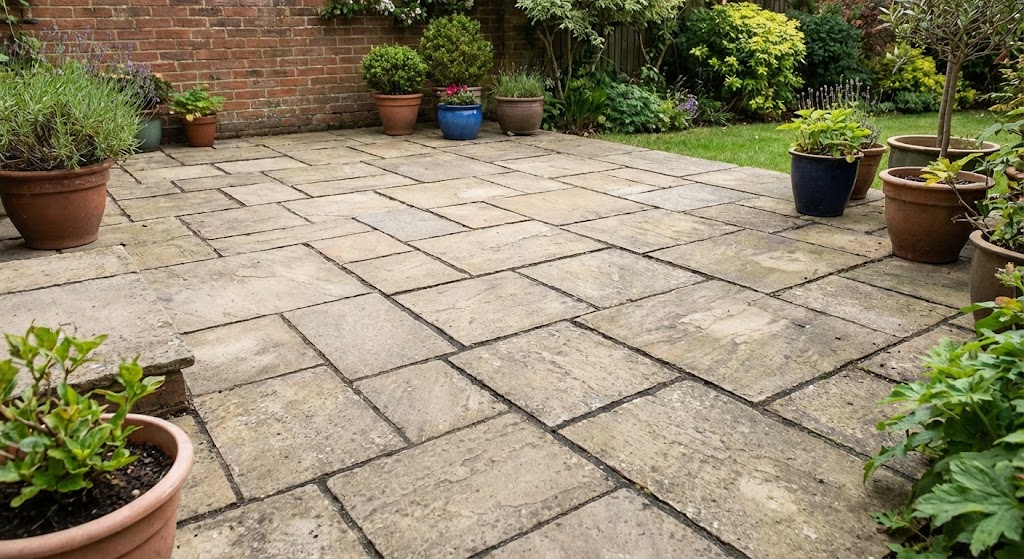
Prevention is what makes the results last. Use this simple routine:
- Weekly in spring and summer: quick sweep to remove dust, cuttings and leaves.
- Monthly: brush joints with a stiff broom, especially after mowing or potting.
- Autumn: keep leaf fall under control; decomposing leaves are a major source of joint debris.
- After heavy rain or winter: inspect joints and top up where needed to prevent voids.
Common Mistakes That Make Weeds Return
Mistake 1: Killing Weeds But Leaving The “Soil” Behind
If you spray or scorch weeds but do not remove the debris they rooted in, you have not changed the conditions. The next seeds will germinate in the same material. Always combine removal with joint cleaning.
Mistake 2: Pressure Washing Straight Into Joints
High pressure aimed into joints can remove sand and jointing material, loosen blocks, and create larger voids. It can also spread contaminated water onto adjacent planting. If you use a pressure washer, treat it as a rinsing tool, not a digging tool.
Mistake 3: Relying On Salt, Bleach Or Harsh Acids
Household chemicals can damage paving, harm nearby plants, and create disposal problems. Acidic products can etch some stones, and even “mild” DIY mixtures can cause unintended damage. For example, vinegar is corrosive and can potentially damage plants. If you want a simple chemical-free option, hot water and mechanical removal are safer starting points.
Mistake 4: Not Replacing Jointing Material After Weeding
Weeding often removes some sand or jointing. Leaving joints partially empty invites detritus, holds moisture, and accelerates regrowth. Refill joints promptly once the surface is clean and dry.
When Diy Weed Control Is Not Enough
Signs You May Need Refurbishment Or Professional Help
- Persistent pooling water or waterlogging that keeps joints damp.
- Loose slabs, rocking blocks, or visible sinking that indicates sub-base issues.
- Edges that have failed, allowing soil to wash onto paving after rain.
- Repeated joint failure (cracking, wash-out) after multiple repairs.
In these cases, weed control products alone will never deliver a long-lasting fix. You may need drainage improvements, re-bedding, edge restraints or full re-pointing.
What to Buy and Where to Get It
If you want a straightforward, system-based approach, choose products that match the steps in this guide: remove, clean, repair and prevent. This reduces guesswork and helps avoid mixing incompatible treatments.
- Weed removal tools: joint scraper or weeding knife, stiff broom and paving brush. Find these in garden tools and equipment.
- Weedkillers and weeding solutions: choose an authorised product suitable for hard surfaces and follow the label instructions. Options are available under weed killer and weeding solutions.
- Cleaning and preparation: patio cleaners, brushes and surface prep essentials are available in cleaning and surface preparation.
- Joint repair: for slabs and patios, compare suitable options in patio, path and driveway pointing.
- Optional protection: if you decide to seal, start with patio, path and driveway sealers and review the sealer selection guide.
To keep the buying journey simple, start with path, patio and driveway for hard-surface products, and use garden care and maintenance for ongoing upkeep. This keeps the approach consistent across cleaning, weed control and joint repair.
Summary
To keep paths, patios and driveways weed-free, focus on the root causes, not just the visible growth. Start by scraping or pulling weeds, then scrub out the fine debris in joints where seeds germinate. Refill joints promptly (resand block paving or re-point slabs) so water and dirt cannot sit in voids. Use weedkiller only for weeds that repeatedly re-sprout from roots you cannot extract, and always follow the current product label for safe, legal use. Finally, prevent regrowth with a simple routine: sweep regularly during the growing season, clear leaf fall before it turns to sludge, and top up jointing after winter or after any deep cleaning. If you choose to seal, treat it as an add-on after joints are sound and the surface is fully dry, not as a substitute for maintenance.
Frequently Asked Questions
Why do weeds grow between paving slabs even if there is a sub-base?
Seeds land on the surface and germinate in fine debris trapped in joints. Clear joints thoroughly and refill them to reduce regrowth.
Is it better to pull weeds or use weedkiller?
Pulling and scraping is usually best for light growth. Weedkiller is more useful for persistent deep-rooted weeds that cannot be physically extracted.
Will boiling water kill weeds permanently?
Boiling water can knock back growth, but it does not prevent new seeds from germinating. Follow up by cleaning joints and improving prevention.
Can I pressure wash weeds out of paving joints?
Pressure washing can remove jointing material and create larger voids. Use it carefully and avoid blasting directly into joints.
Do I need to resand block paving after weeding?
Often yes. Weed removal can pull out jointing sand. Refill joints once they are clean and dry to support stability and reduce debris build-up.
Do sealants stop weeds?
Sealants can help reduce weed settlement in joints, but they cannot stop debris accumulating on the surface. Regular sweeping still matters.
Are “home-made” weedkiller mixes safe?
Many home-made mixes can damage paving, harm plants and create run-off issues. Start with mechanical methods, and use authorised products only when needed.
When should I repair patio pointing rather than keep treating weeds?
If joints are cracked, missing material or constantly washing out, repair the jointing. Open joints collect debris and encourage regrowth.
What is the safest long-term prevention routine?
Sweep regularly, keep edges tidy, remove leaf litter promptly, and top up jointing after winter or after any deep cleaning.

Path & Patio is a UK supplier of paving and landscaping products, sharing practical guidance, product expertise and installation advice for patios, paths and driveway projects.