
Patio Cleaner by Surface and Stain Type: Algae, Black Spots, Oil, Rust and General Dirt
Patio cleaners are not all designed for the same job. A cleaner that suits green algae on concrete may not be the right choice for an oil stain on block paving, rust marks on light slabs, black spots on natural stone, or leaf tannins on a pale patio. Choosing by stain type and surface gives a better starting point than choosing by brand alone.
This guide is for UK homeowners, DIY patio users and trade buyers who need to clean paths, patios, driveways, paving slabs, concrete, block paving, stone or masonry before maintenance, re-jointing, sealing or general outdoor use. It explains how to identify the mark, what to check before buying a cleaner, when to test first, and when cleaning may not solve the underlying issue.
The main risk is using the strongest-looking cleaner on the wrong surface. Some marks need a targeted cleaner, while others need preparation, brushing, repeated treatment or a different maintenance route. The safest approach is to identify the surface, identify the stain, check product suitability, test a small area and protect surrounding plants, pets, skin and eyes during use.
Quick Cleaner Match
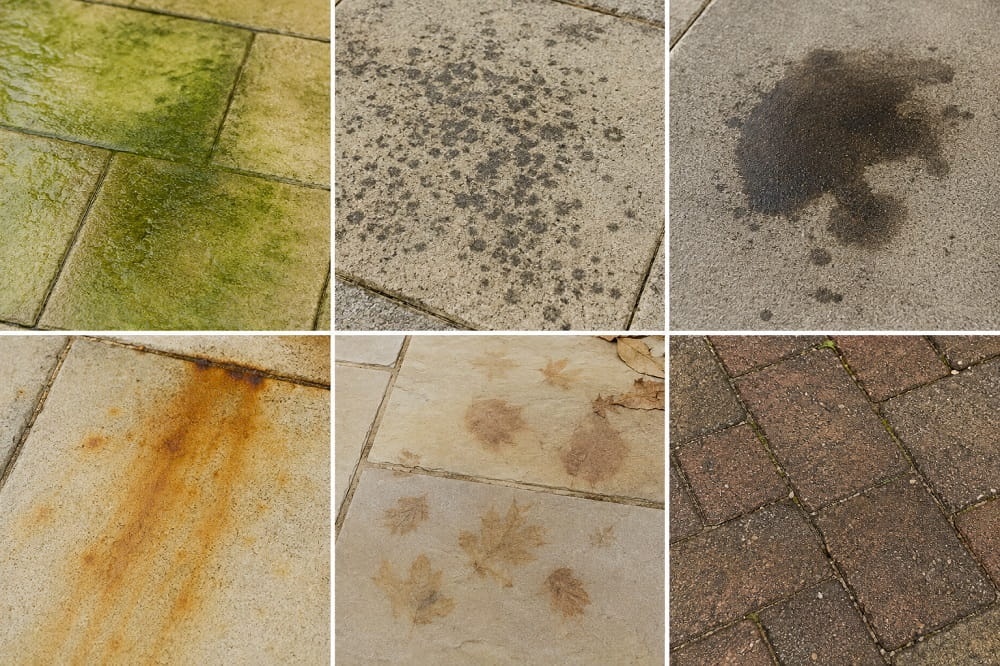
- Safest default: Identify the surface and stain before buying a cleaner, then test a small area before treating the whole patio.
- Green algae and mould: These usually need an outdoor surface cleaner or algae-focused product, plus follow-up brushing and maintenance.
- Oil stains: These usually need an oil stain remover, not a general patio wash.
- Black spots: These can be stubborn and may need a specialist cleaner, repeat treatment or more patience than general dirt.
- Rust and tannin marks: These should be checked carefully because the wrong cleaner can make pale or porous surfaces look worse.
- Stop before cleaning: Pause if the paving is delicate, newly sealed, unknown, loose, badly stained, or if the cleaner label warns against your surface type.
What This Cleaner Guide Cannot Fix
This guide does not replace the label or safety instructions for any cleaning product. Always check surface suitability, dilution, application time, rinsing instructions, PPE requirements, storage instructions and disposal guidance before use.
This guide also does not prove that a stain can be fully removed. Some marks are deep, old, heat-affected, oil-soaked, rust-stained, or weathered into the surface or linked to the paving material itself. Cleaning may improve the appearance without returning the surface to its new condition.
Cleaning also does not solve failed drainage, loose slabs, crumbling concrete, failed sealers, unstable jointing or poor surface falls. If the surface keeps turning green, stays wet for long periods or repeatedly stains in the same area, the cause may be shade, drainage, run-off, plant debris or surface condition rather than the cleaner alone.
Safety Checks Before Cleaning
Pause before using any cleaner if you do not know the surface type, the paving is newly sealed, the area drains into a pond or planted border, pets use the area, or the product label warns against the surface. Do not mix cleaning chemicals. Do not assume that a stronger cleaner is safer or more effective.
Escalate or seek specialist advice if the stain may be from fuel, solvents, chemicals, paint, cement contamination, acid damage, or an unknown spill. Some marks are not normal garden dirt and may need a controlled clean-up rather than a standard patio cleaner.
Use suitable gloves and eye protection where the label requires it. Keep children and pets away during application and until the surface is safe to use again. Protect nearby plants and rinse equipment carefully where the product instructions require it.
Why the Surface Matters as Much as the Stain
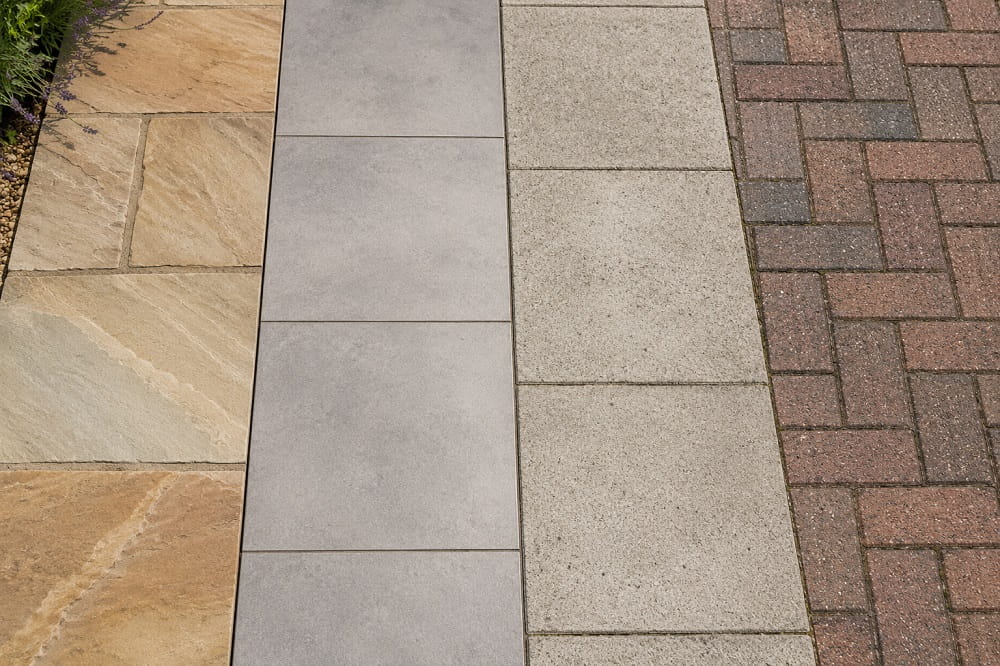
The same stain can behave differently on different surfaces. Smooth concrete, textured concrete, Indian sandstone, porcelain, block paving, limestone, granite and old slabs can all absorb, hold or release marks in different ways.
Porous surfaces can pull stains deeper into the material. Dense surfaces may leave marks sitting closer to the top. Textured paving can trap dirt in tiny surface grooves. Block paving can hold oil and weeds in the joints. Natural stone can vary from slab to slab, which makes testing important.
Indian sandstone and natural stone
Natural stone often needs more caution because colour, porosity and mineral content can vary. Some cleaners may affect the finish, lighten or darken the surface, or leave uneven results if used without testing.
Use a small test area before cleaning the full patio. This is especially important on pale sandstone, mixed-colour paving and any surface where appearance matters.
Concrete slabs and concrete driveways
Concrete can hold oil, rust, tyre marks and general grime. It can also become patchy if only one small area is cleaned aggressively. Match the cleaner to the stain and blend the clean-down area where possible.
If concrete is crumbling, dusty or breaking down, cleaning alone will not repair it. A surface that is physically failing may need repair or treatment before cosmetic cleaning makes sense.
Porcelain paving
Porcelain is often dense, but textured porcelain can still hold dirt, grout haze, algae and surface marks. Cleaner choice should still be checked because surface texture, jointing residue and previous treatments can affect the result.
Abrasive tools can scratch some surfaces. Use cleaning tools and products that match the paving manufacturer’s guidance where available.
Block paving
Block paving has both surface and joint issues. Oil, weeds, moss and dirt can sit between blocks as well as on top of them. Cleaning the blocks without checking the joints can leave the driveway looking unfinished.
If jointing sand is loose or missing, cleaning may disturb it further. Re-sanding or stabilising may be needed after cleaning, depending on the condition and product system.
Match the Cleaner to the Mark
The best cleaning route starts with the mark. Do not treat every stain as general dirt. Identify what you are trying to remove, then choose the least aggressive product that is suitable for the surface.
Green algae, moss and mildew
Green growth is common on shaded patios, north-facing areas, damp paths and surfaces under trees or garden furniture. It often comes back where the area stays wet, dirty or shaded.
Use this type of cleaner when the surface is green, slippery or stained by organic growth. Do not rely on one clean if the area stays damp or is covered by leaves most of the year. Maintenance and airflow matter too.
For product browsing, the garden care and outdoor maintenance range is a useful starting point for cleaning and maintenance products.
Oil and grease
Oil stains from cars, barbecues, tools or garden machinery often need a dedicated oil remover. A general patio cleaner may improve surrounding dirt but leave the oil mark behind.
Oil can soak into porous surfaces. Newer stains are usually easier to treat than old stains. Blot fresh oil where safe, avoid spreading it, and use a cleaner designed for oil where the surface allows it.
For oil-focused cleaning, compare products such as Sika Oil Remover for driveways, paths and patios or Bond It oil stain remover for patio and driveway marks.
Black spots
Black spots can be harder to remove than ordinary dirt because they often sit deeply in textured or porous paving. They may need a targeted patio cleaner and sometimes more than one treatment.
Do not assume black spots will disappear with pressure washing alone. Aggressive pressure washing can damage joints and delicate surfaces while leaving the marks behind.
Rust marks
Rust stains can come from metal furniture, plant pots, tools, fire pits, fertiliser, water run-off or iron-rich debris. Rust can be especially noticeable on pale slabs and natural stone.
Use care before applying general acid-type cleaners or strong products. Rust removal depends heavily on surface type. A test area is important because the wrong cleaner may alter the surrounding paving.
Leaf tannins and organic staining
Leaves, berries, bark, planters and wet garden debris can leave brown or yellow marks. These stains may fade with weathering or cleaning, but some can hold strongly on porous stone.
Remove organic debris regularly and avoid leaving wet leaves under furniture or planters for long periods. Cleaning may help, but prevention is often easier than removal.
General dirt and weathering
General grime usually needs sweeping, washing, brushing and a suitable outdoor cleaner. It is the simplest type of clean, but it can still look patchy if the surface has older stains underneath.
For stone and masonry-style cleaning routes, the brick, masonry and patio cleaners range gives a more targeted product path.
Cleaner Choice by Surface Condition
The surface condition tells you how cautious to be. A new, dense, lightly dirty patio is very different from an old, porous, stained and previously sealed surface.
Light dirt on sound paving
Start with sweeping, brushing and a cleaner suitable for the surface. Avoid jumping straight to the strongest treatment if the mark is mainly loose grime.
Heavy grime on textured paving
Textured paving can trap dirt in surface grooves. A stiff brush may help, but do not use a tool that scratches or damages the surface. Work in small areas and rinse in line with product guidance.
Old stains on porous paving
Older stains can sit deeper in porous material. They may improve rather than disappear completely. Set expectations before buying and check whether the product is suitable for the stone or concrete type.
Previously sealed surfaces
Pause if the surface has an old sealer or unknown coating. Some cleaners may react differently on sealed surfaces. If the old coating is peeling, cloudy or patchy, cleaning may not be enough.
Testing and Cleaning Preparation
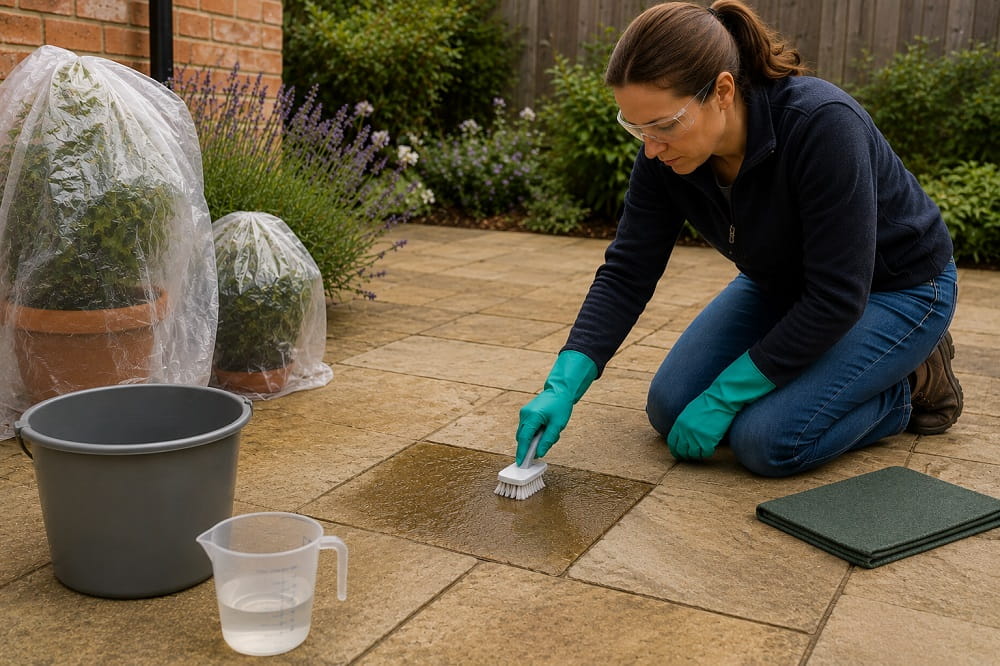
Testing is not wasted time. It helps avoid big visible mistakes on the full patio. A small test area can show colour change, surface reaction, cleaning strength, residue and rinsing behaviour.
Choose a discreet test area
Pick a small area that is hidden but representative. Do not test only on a clean corner if the main patio is stained and shaded. The test area should give a fair view of the result.
Read the label before opening
Check dilution, surface suitability, contact time, PPE, weather conditions, rinsing, storage and disposal. Do not mix different cleaners. Do not apply a product to a surface it warns against.
Prepare the area
Move furniture, pots, mats and loose items. Sweep the area first. Protect plants where needed. Keep pets and children away until the surface is safe again.
Use suitable tools
Brushes, brooms, sprayers, gloves, buckets and clean water can all affect the quality of the clean. A good cleaner used with the wrong tool can still leave poor results.
For hand tools and outdoor cleaning accessories, use the brooms and hand brushes for cleaning tasks category.
Cleaning Errors That Make Patios Look Worse
One common mistake is using one cleaner for every stain. Oil, algae, rust, tannins and general grime are different problems. Match the product to the mark.
Another mistake is using too much pressure. Pressure washing can remove surface dirt, but it can also disturb joints, damage delicate paving or create uneven clean lines.
A third mistake is cleaning only the visible stain. If the surrounding patio is weathered, one clean patch can stand out. Blend the cleaning area where possible.
Some users clean and seal on the same day without checking drying times. A surface can look dry while moisture remains inside the paving. This can affect sealer results later.
Another mistake is ignoring the cause of the stain. If oil keeps dripping from a vehicle, leaves keep collecting under furniture, or water keeps pooling in one area, the stain is likely to return.
Keeping the Surface Cleaner for Longer
Once the patio or driveway is clean, the next job is reducing the conditions that caused the staining. Regular sweeping, clearing leaves, moving pots, lifting mats and improving airflow can all help.
Keep shaded areas under review. Green growth often returns where surfaces stay damp. If water stands after rain, check whether the fall, drainage or nearby soil level is contributing.
For driveways, act quickly on fresh oil. The longer oil sits on porous paving, the harder it may be to reduce the mark. Keep absorbent material and a suitable cleaner available if vehicles are parked on the surface regularly.
If the surface is clean, dry and suitable, sealing may be a follow-up option. It is not always needed, and it should not be used to hide stains. For suitable surfaces, compare products in the patio and driveway sealer range.
Product Routes for Patio Cleaning
Before buying, identify the stain, surface, age of the mark and whether the area has been sealed before. Choose a cleaner after those checks, not before them.
For general stone and patio marks, compare options such as Joint-It So Clean 1L for patio and stone cleaning or the larger Joint-It So Clean 5L masonry and stone cleaner, where the surface and instructions fit.
For algae-focused cleaning, compare Joint-It Algae Remover Concentrate 5L or Joint-It Algae Remover Spray 1L. For pressure washer cleaning fluids, a product such as Karcher Stone Path and Patio Cleaner may be relevant where the tool and surface are suitable.
A sensible cleaning basket may include the chosen cleaner, gloves, eye protection where needed, a brush or broom, a bucket, clean water and a plan for protecting plants and nearby surfaces. Do not buy a cleaner alone if the job also needs brushing, rinsing, stain testing or follow-up aftercare.
Key Points to Remember
Patio cleaning works best when the cleaner is matched to both the stain and the surface. Algae, black spots, oil, rust, tannins and general grime should not all be treated the same way.
Check the paving type, read the cleaner label, test a small area and protect nearby plants, pets and people before cleaning the whole surface. If the surface is stained because of drainage, shade, oil leaks or repeated debris, deal with the cause as well as the mark.
Frequently Asked Questions
What is the best patio cleaner?
The best patio cleaner depends on the surface and the stain. A general cleaner may suit everyday grime, but oil, algae, black spots and rust usually need more targeted checks.
What removes oil from block paving?
Oil stains usually need an oil-focused cleaner rather than a general patio wash. Fresh oil is usually easier to treat than old oil that has soaked into porous paving.
Can patio cleaner damage sandstone?
Some cleaners may be unsuitable for natural stone or may change the appearance. Test a small area first and check product guidance before using any cleaner on sandstone.
Can I use bleach on patio slabs?
Do not use bleach without checking whether it is suitable for the surface, surrounding plants, drainage and safety conditions. A product designed for outdoor paving is usually a more controlled route.
Should I pressure wash before using patio cleaner?
It depends on the surface and the cleaner. Some jobs benefit from removing loose dirt first, but aggressive pressure washing can damage joints or delicate paving.
How do I stop green algae from coming back?
Keep the surface swept, reduce leaf build-up, improve airflow where possible and check damp or shaded areas. Cleaning may need to be repeated if the surface stays wet.
Should I seal after cleaning a patio?
Sealing may be useful on some clean, dry and suitable surfaces, but it should not be used to cover stains or damp problems. Check the sealer and surface guidance first.
Why does one clean patch look lighter than the rest?
A heavily cleaned area can stand out against weathered paving. Blend the cleaning area where possible and test first so the final appearance is less surprising.

Path & Patio is a UK supplier of paving and landscaping products, sharing practical guidance, product expertise and installation advice for patios, paths and driveway projects.