
DIY Driveway Sealing: Step-by-Step Guide for Block Paving, Tarmac and Concrete (UK)
Sealing a driveway is not a cosmetic shortcut. Done properly, it can improve how your drive looks, reduce staining, and make routine cleaning easier. Done badly, it can trap moisture, go cloudy, peel, or become patchy and slippery.
This guide gives you a practical, UK-focused method for sealing three common driveway surfaces: block paving, tarmac (asphalt) and concrete (including imprinted concrete). You will learn how to choose a compatible sealer, prepare the surface properly, apply it cleanly, and plan around UK weather so you do not waste time or product.
Quick answer: how do you seal a driveway successfully?
- Only seal once the surface and joints are completely dry, not just surface-dry.
- Choose a sealer designed specifically for your driveway surface (block paving, tarmac or concrete).
- Fix loose blocks, cracks and joint loss before sealing, not after.
- Apply thin, even coats and protect the surface until curing is complete.
Who this guide is for (and when sealing is the wrong choice)
This guide is written for UK homeowners and competent DIY users sealing domestic driveways as part of surface protection and routine maintenance.
This guide is not suitable if:
- The driveway has structural movement, subsidence or failed edges
- Standing water persists after rain
- The surface is newly laid, recently repaired or still curing
- Previous coatings cannot be identified or removed
When to pause or seek professional advice
If moisture remains trapped in joints or the substrate, or if past sealing attempts have failed, professional assessment is usually safer than re-application.
1) Identify Your Driveway Surface and Set the Right Goal
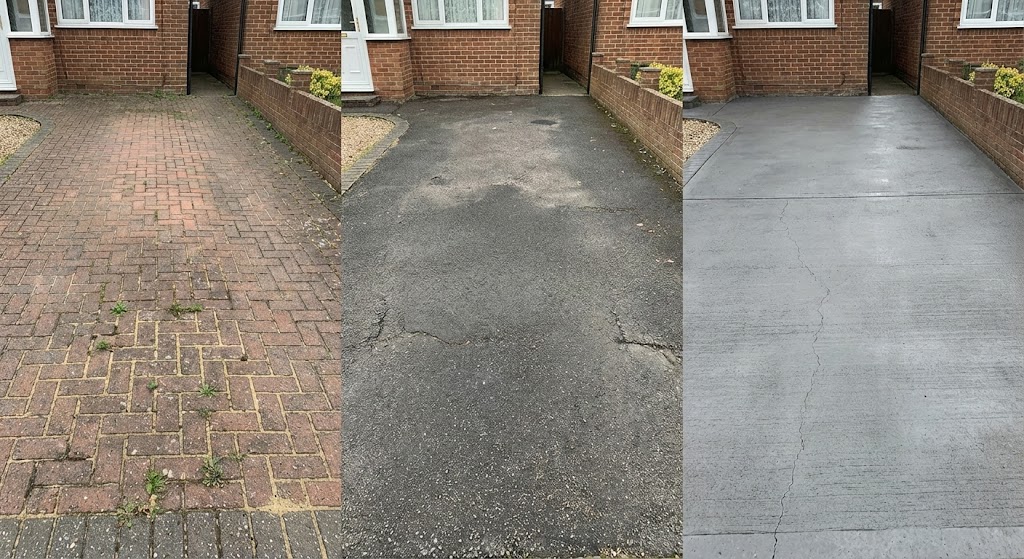
Quick Surface ID: What Are You Sealing?
Start by naming the surface correctly. Your sealer choice, prep steps and curing risks depend on it.
- Block paving: Individual blocks or pavers with sand-filled joints. Often has weed growth in joints when the sand is low or contaminated.
- Tarmac/asphalt: A continuous black or dark surface with a fine aggregate texture. Older tarmac may look grey and “dry” as the binder weathers.
- Concrete: A continuous slab or patterned (imprinted) surface. Can show dusting, small cracks, or surface staining.
What Sealing Can Do (and What It Cannot)
Sealing is mainly about surface protection and appearance. It can deepen colour, reduce porous absorption (helping with staining), and create a more washable surface. On block paving, certain products also stabilise jointing sand, which can reduce joint loss and make the surface feel more “locked in”.
Sealing is not a fix for structural issues. If your driveway is sinking, rocking underfoot, holding standing water, or breaking up, sealing will not solve the root cause. In those cases, put your budget into repairs (sub-base, drainage, relaying, crack repair) before you think about sealers.
When to Delay or Avoid Sealing
Delay sealing if any of the following apply:
- Persistent damp: The surface looks dry but joints or lower layers remain wet for days. Moisture is a common cause of whitening, clouding and poor adhesion.
- Recent installation or major repairs: New paving, new concrete, or fresh tarmac repairs often need time to stabilise and dry out. Sealing too early is a common failure trigger.
- Contamination you cannot remove: Oil staining, algae, moss, and dusting concrete can stop sealers bonding properly unless fully cleaned and stabilised.
- Unknown previous coatings: If you cannot identify what was used previously, assume compatibility risk and do a small test patch first.
2) Choose the Right Sealer: A Practical Selection Framework
Film-Forming vs Penetrating: The Decision That Matters Most
Most driveway sealers fall into two broad behaviours:
- Film-forming (surface film): Leaves a visible finish (often “wet look”, satin or matt). These can enhance colour strongly but can be more sensitive to application errors and moisture during curing.
- Penetrating (within the surface): Soaks into pores to reduce absorption without creating a heavy surface film. Often preferred where slip resistance and a “natural” look matter most.
The Concrete Society’s coating guidance highlights that some products form a surface film (barrier coatings) while others penetrate pores (pore blockers and pore liners), and that you must match product type to the substrate and conditions.
Finish Choices: Wet Look, Satin and Matt
Finish is not just about appearance. Higher sheen products can show roller marks, puddling and overlaps more clearly. They can also change traction when wet. If slip risk matters (slopes, shaded drives, frequent rain), consider a more subtle finish or a system that supports anti-slip additives.
Be cautious of any sealer that promises a dramatic transformation. Sealants can have a permanent and sometimes irreversible effect, so always carry out a discreet test patch before committing to the full driveway.
Surface-by-Surface Matching (The Simplest Rule-Set)
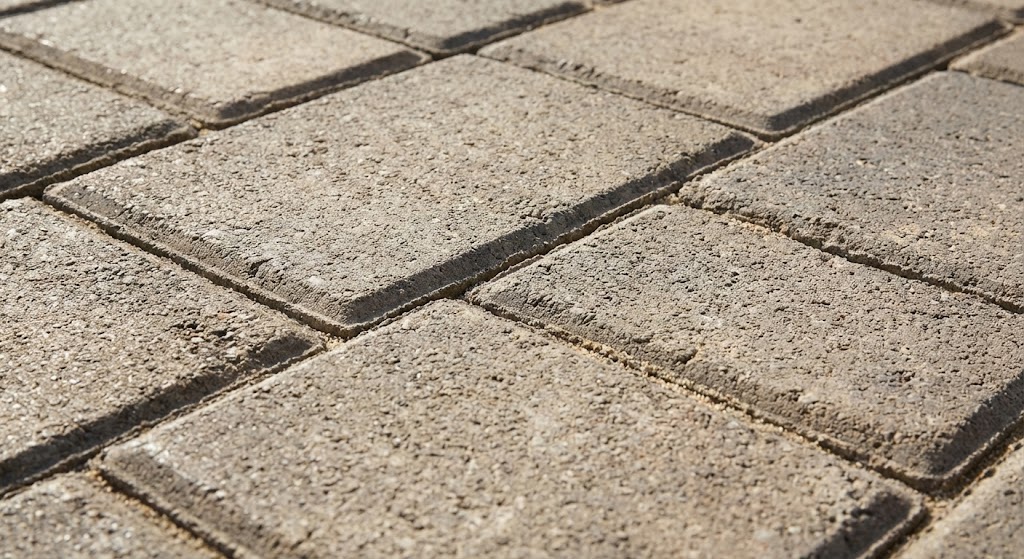
- Block paving: Choose a sealer designed for block paving, ideally one that can stabilise or lock jointing sand if that is part of your goal. If your joints are already weak, prioritise joint performance and correct re-sanding.
- Tarmac/asphalt: Choose a product designed for tarmac restoration or sealcoating. Some behave more like a “paint” and are cosmetic; others bond and help revitalise the binder. Cover-up products are typically best used over the whole area for a consistent finish.
- Concrete (including imprinted): Choose based on whether you want a film-forming finish (colour enhancement) or a more subtle penetrating protection. Ensure the surface is clean, sound, and dry.
Compatibility Checks (Do These Before You Buy)
Before choosing a product, check:
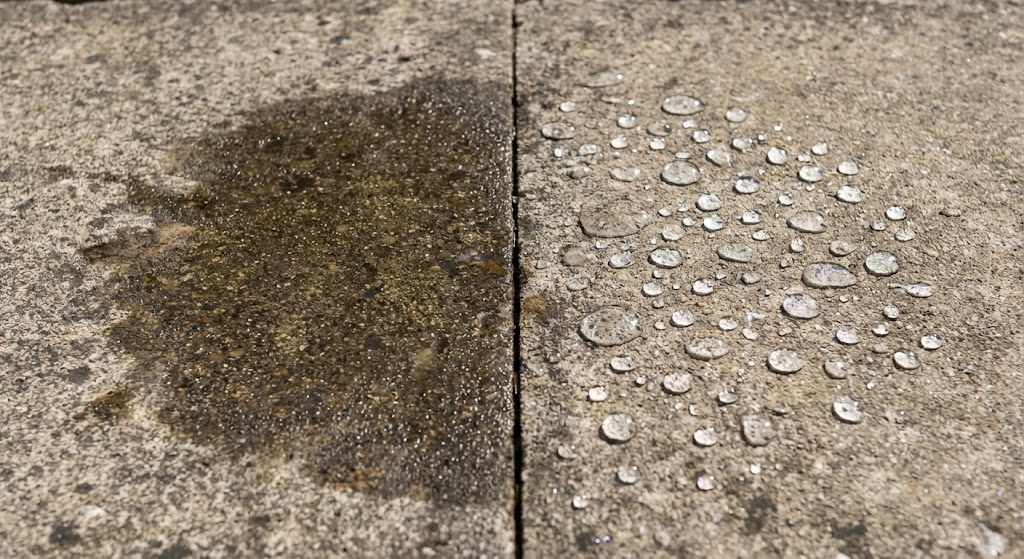
- Previous sealer presence: If water beads strongly on the surface, a previous sealer may still be active. That does not automatically mean you cannot reseal, but it increases compatibility risk.
- Porosity and absorption: If the surface drinks water instantly, it is likely porous and may need a product that penetrates or a primer system depending on material.
- Breathability needs: Where moisture movement through the slab is likely (older concrete, unclear base), avoid trapping moisture with an inappropriate heavy film.
- Use case: High traffic, turning wheels, and oil drip zones need more robust systems than a lightly used drive.
For a quicker way to compare compatible options, refer to our internal guide: Patio and Driveway Sealers: How to Choose the Right One.
3) Safety and Planning for UK Conditions
DIY Driveway Sealing Safety: A COSHH-Style Risk Approach
Even if you are working at home rather than on a site, driveway sealers are still chemical products with handling and exposure risks. Treat your project like a small, one-off COSHH assessment: identify hazards, reduce exposure, and plan for spills and clean-up.
The HSE explains that safety data sheets (SDS) provide information on hazards and handling, and help users make a risk assessment. It also makes the key point that an SDS is not a risk assessment in itself, but supports your own assessment: HSE: chemical safety data sheets.
PPE, Ventilation and Containment
Prioritise “control first, PPE second”. The HSE’s COSHH PPE guidance notes that PPE is used when other measures are inadequate and only protects while worn: HSE: COSHH PPE basics.
For most driveway sealing projects, the practical controls are:
- Ventilation: Work outdoors (obvious), avoid still air pockets near walls and garages, and keep doors/windows closed if fumes could drift inside.
- Keep people and pets away: Plan a no-access zone until fully cured.
- Contain run-off: Do not allow wash water or excess sealer to flow into surface water drains. Use absorbent materials and follow product guidance for disposal.
- Correct PPE: At minimum, gloves and eye protection; for solvented products, the product label/SDS may specify respiratory protection.
Weather Windows: Plan for Drying, Not Just Application
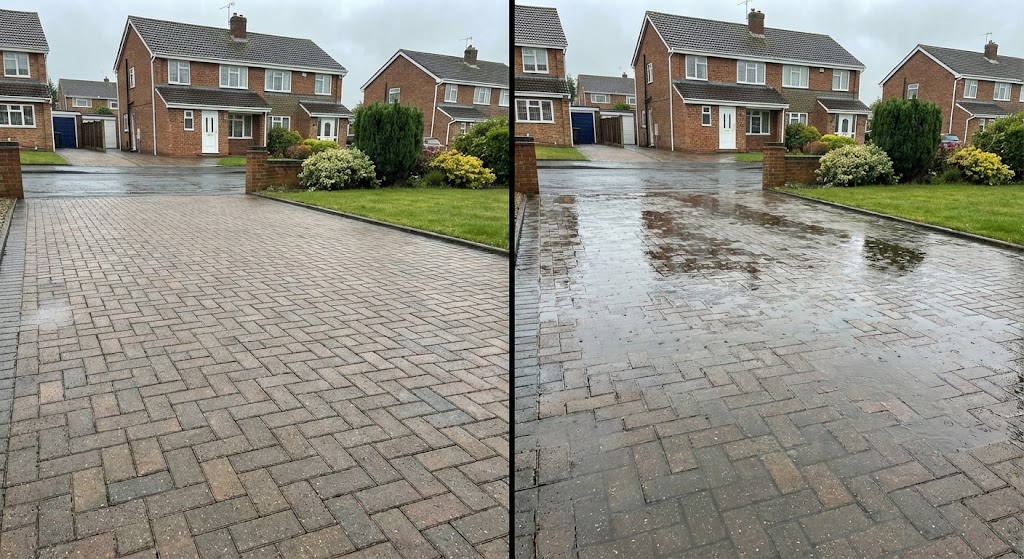
UK weather is the biggest practical constraint. The surface needs to be fully dry before application and must stay dry throughout the curing period. As a conservative rule, plan for several consecutive rain-free days before sealing, with longer allowances during cooler or more humid months.
Use that mindset rather than gambling on a single dry afternoon. In practice:
- Dry surface and dry joints (block paving): Joints hold moisture longer than the surface face.
- No rain forecast during curing: Follow the product instructions, but build your own buffer.
- Temperatures within label guidance: Many products have minimum temperature limits. If you cannot confirm your overnight lows stay above the label minimum, postpone.
4) Tools and Materials Checklist
Cleaning and Prep Kit
- Stiff outdoor brush and a softer brush for final dust removal
- Pressure washer (optional) with appropriate nozzle and care not to damage joints
- Degreaser (for oil spots) and appropriate driveway/patio cleaner
- Scraper for stubborn algae or lichen (avoid gouging softer surfaces)
- Bucket, watering can or hose for controlled rinsing (where safe and appropriate)
For suitable tools and prep accessories, start with: cleaning and surface preparation products.
Application Kit
- Long-handled roller frame with compatible roller sleeve (often medium pile)
- Paint tray or scuttle
- Brush for edges and tight areas
- Squeegee (common for some tarmac cover-up products)
- Masking materials: tape and protective sheeting for walls, thresholds and adjacent landscaping
If you want trade-grade options, browse: contractors and professional tools.
Repair Materials by Surface Type
- Block paving: kiln-dried jointing sand; replacement blocks (if damaged); optional joint stabilising compound depending on system.
- Tarmac: suitable repair product for cracks/potholes; oil spot treatment; sweeping and cleaning gear.
- Concrete: crack filler or repair mortar where appropriate; cleaner suited to concrete; potentially a primer depending on sealer system.
Safety and Protection
- Gloves and eye protection as a baseline
- Protective clothing you do not mind ruining
- Warning cones or signage to prevent accidental access
- Absorbent material for spills (follow your product guidance)
5) Preparation That Makes or Breaks the Result
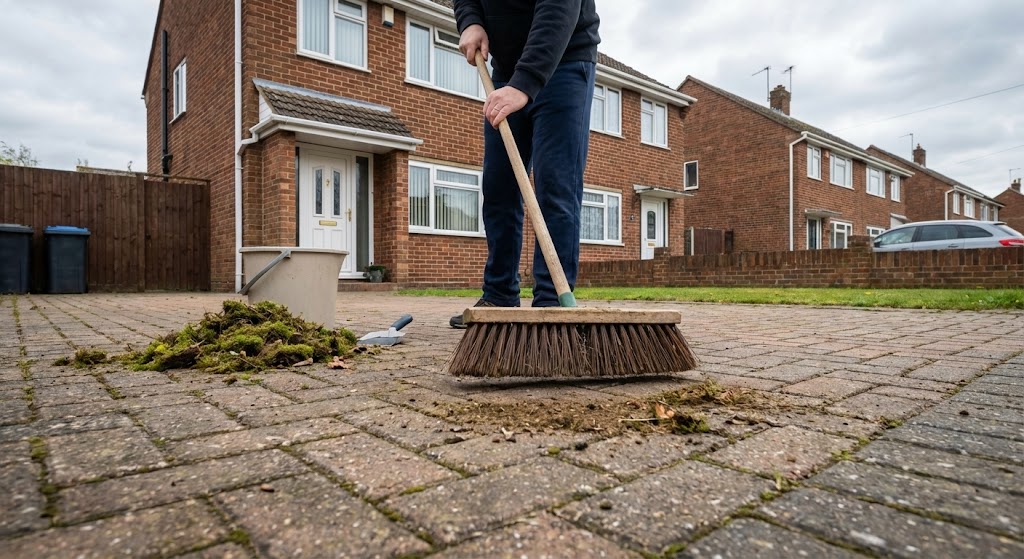
Step 1: Clean Properly (Remove What Stops Adhesion)
Your goal is not “looks clean”. Your goal is “free from loose material, organic growth, and contamination that blocks bonding”. The Concrete Society’s guidance on coatings for concrete is blunt on the principle: before coating, the surface must be clean and free of loose material. That is a good rule for any driveway surface.
Practical cleaning priorities:
- Algae and biofilm: Common in shaded UK drives. If left, it becomes a weak layer under the sealer.
- Dust and detritus: Fine dust causes poor bonding and early flaking.
- Oil spots: Treat separately. Many sealers will not adhere well to oil-contaminated areas.
- Joint contamination (block paving): If joints are full of soil and organic matter, re-sanding without cleaning first is a waste of time.
Step 2: Repair What Sealing Cannot Hide
Sealer will highlight defects if anything. Fill cracks, fix loose edges, and address standing water. If you skip repairs, you risk:
- Cracks telegraphing through and re-opening
- Water pooling and disrupting curing
- Loose blocks continuing to move, damaging the sealer film and the joints
Step 3: Drying Is Not Optional (Especially for Block Paving Joints)
Moisture is one of the most common causes of sealer failure. The surface may look dry, but moisture can remain in the upper layers and joints. Take a conservative approach and only seal once the surface has dried through, rather than trying to work between showers or during marginal conditions.
Practical DIY dryness checks:
- Visual and touch: No dark damp patches, no cool damp feel in shaded areas.
- Joint check (block paving): Scrape a shallow channel in a joint and look below the surface. If darker or clumped, it is still damp.
- Morning dew risk: If overnight temperatures are close to the dew point, surfaces can “rewet” in the early morning. Plan for late morning onward application in stable conditions.
Step 4: Mask and Protect Edges
Sealer overspray or roller splatter on brickwork, thresholds and garage doors is difficult to clean. Mask first, and protect planting. Also plan your exit route: start at the far end and work back so you do not seal yourself in.
6) Block Paving: Step-by-Step Sealing
Block Paving Basics: Joints Matter as Much as the Surface
Block paving relies on jointing sand for interlock and stability. The sand creates friction between the blocks, helping the surface act as a single system. If cleaning has removed jointing sand, it needs to be replaced. Treat jointing as part of the surface’s structural performance, not just a cosmetic detail.
Step-by-Step: Re-Sand First, Then Seal
- Remove weeds and organic matter from joints. If you leave root material, it becomes a weak point under a sealer and encourages regrowth.
- Clean thoroughly and allow to dry fully. This is where many DIY jobs fail: the surface face dries, but the joints stay damp.
- Re-sand with kiln-dried sand on a dry surface. The surface needs to be dry so kiln-dried sand sweeps across the blocks without sticking. If the sand clumps, stop and wait for better drying conditions.
- Brush sand into joints until they are visibly full. Work systematically, and do not rush. The goal is consistent joint fill.
- Sweep off excess sand on the surface. Leaving significant sand on the surface can lead to patchiness and scuff marks when sealing.
Choosing and Applying a Block Paving Sealer (Clean Application Beats Thick Coats)
If your goal includes stabilising jointing sand, choose a product designed for that purpose. Resiblock’s technical guidance describes products that bond jointing sand and seal the surface of concrete block paving, which is an example of the “joint stabilising” behaviour you want where joint loss is a problem: Resiblock superior application guidelines.
Application principles that prevent most DIY issues:
- Work in manageable sections: Avoid visible “lap marks” by maintaining a wet edge and not letting one area flash off before you blend the next.
- Apply evenly and avoid puddling: Thick pools cure unevenly and can remain tacky or glossy in patches.
- Edges and details first: Cut in around walls, steps and drains with a brush, then roll the main area.
Resiblock’s homeowner application guidance reinforces key practical points: clean thoroughly, ensure the area is completely dry, refill joints with kiln-dried sand on the day of application, and check no sand remains on the surface before sealing: Resiblock: how to apply.
Curing, Joint Top-Ups and Early Aftercare
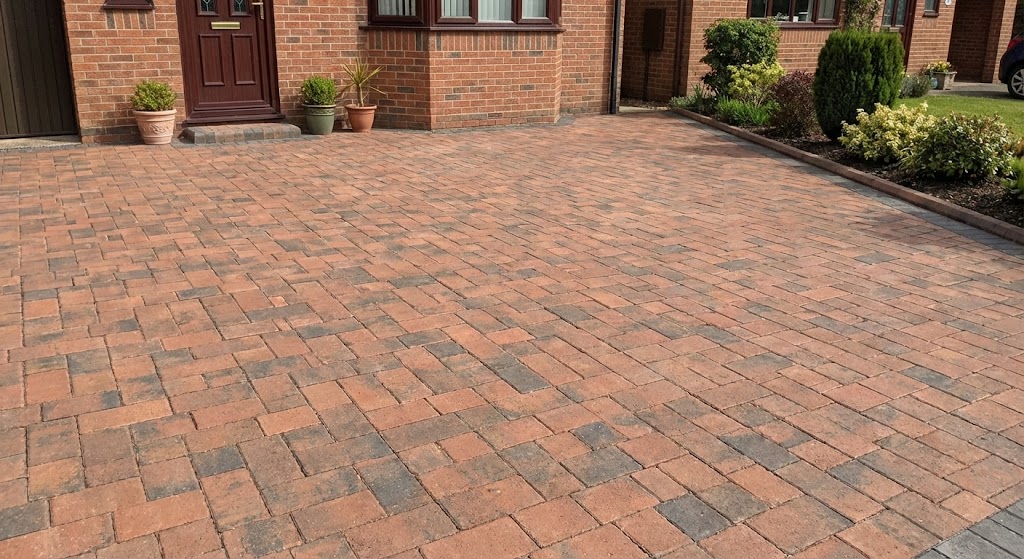
Keep vehicles off until the product is fully cured per the label, not just touch-dry. For block paving, also plan a joint check after the sealer has settled and the driveway has been used. Sand joints should be checked after 4–6 weeks and topped up with kiln-dried sand if needed, because settlement can create partially empty joints.
7) Tarmac/Asphalt: Step-by-Step Sealing
What Tarmac “Sealers” and “Cover-Ups” Actually Do
Tarmac restoration products vary. Some are closer to a cosmetic “paint”; better products can bond more effectively to the surface and help revitalise the binder. These products are typically best used to re-cover an entire driveway or courtyard, rather than touching up patches, because patchy applications often look worse than the original wear.
Prep: Repair First, Then Clean and Dry
Tarmac sealing magnifies poor prep. Work through this sequence:
- Repair cracks and potholes. If your driveway has broken edges or potholes, sealing first wastes product and hides problems you still need to fix.
- Degrease oil spots. Oil and fuel spills are common on driveways and can prevent bonding.
- Power-wash and allow to dry. Good preparation requires cleaning and allowing the surface to dry fully before applying any sealcoat products.
If you have used a cold-lay tarmac repair product, allow it to cure properly before sealing. Some practitioner advice suggests waiting several weeks (for example around four weeks) after laying cold cure tarmac before sealing. Treat this as a caution and always follow the repair product’s own instructions and curing guidance.
Application: Consistent Coats Over the Full Area
Follow the product label precisely, but these practical rules usually apply:
- Mix thoroughly: Settlement in the tin is common. Poor mixing leads to uneven colour and performance.
- Apply in thin, even coats: Over-application can lead to slow curing and tracking marks.
- Plan for two coats if specified: Two coats are usually required for cover-up style products, with drying between coats. Treat this as common practice, not a universal rule.
- Keep traffic off: Reintroduce vehicles only after the product is cured, not just “dry to touch”.
Aftercare: Reduce Early Scuffing
For the first period after curing, avoid tight turning on the spot (turning wheels while stationary) where possible, especially in hot spells. This helps prevent scuffing on newly coated surfaces. If your driveway is used heavily, prioritise robust products and careful curing windows rather than rushing the job.
8) Concrete and Imprinted Concrete: Step-by-Step Sealing
Assess the Concrete: Do Not Seal Over Weak or Dusty Surfaces
Concrete can fail at the surface even when the slab is structurally sound. Common issues include:
- Dusting: Fine powder on the surface indicates a weak surface layer. Sealer may bond to the dust rather than the slab.
- Laitance or loose material: Needs removal for proper adhesion.
- Oil staining: Requires degreasing and may still show through depending on sealer type.
The Concrete Society’s surface coatings guidance reinforces the fundamentals: before coating, the concrete surface must be clean and free of loose material, and you should observe manufacturer requirements for temperature and moisture conditions: Concrete Society: surface coatings.
Prep: Clean, Remove Loose Material, Then Confirm Dryness
- Remove loose surface material: Brush and wash away friable material. If the surface is crumbling or scaling, repair first.
- Clean stains appropriately: Use cleaners suitable for concrete and rinse thoroughly where applicable. Avoid leaving residues that can interfere with bonding.
- Dry fully: Concrete can hold moisture. If you apply a film-forming sealer over moisture, you increase the risk of clouding.
Choose the Sealer Type That Matches Your Finish Goal
Use the “film vs penetrating” lens:
- Want visible colour enhancement (often on imprinted concrete)? You are usually looking at a film-forming system and must be strict on prep and curing conditions.
- Want subtle protection with minimal appearance change? A penetrating system is often the safer choice for long-term appearance consistency.
The Premium Paints guide (UK-focused) frames driveway sealing by surface type and finish expectations. Use it as a reference point for common decision paths, but still prioritise product-specific instructions for application and curing.
Application: Steady Coverage and Controlled Curing
Most concrete sealers are applied by roller or brush, sometimes by spray. The Concrete Society notes that coatings can be applied by brush, roller or airless spray, depending on material, which matches common product practice. Keep these rules in mind:
- Thin, even coats: Thick coats are more prone to uneven curing and visible lap marks.
- Maintain a wet edge: Work systematically to avoid overlaps drying at different rates.
- Protect from water during curing: No rain, no hose splashes, no overnight dew exposure if the product warns against it.
9) Troubleshooting and Common Mistakes
Clouding or Whitening
Clouding is commonly caused by moisture in the substrate or joints reacting with uncured sealant. Moisture can migrate upward through the surface and interfere with curing. The practical fix is prevention: make sure the surface has dried through fully and only seal during a stable, dry weather window.
Peeling and Flaking
Peeling is typically a prep or compatibility failure:
- Dust or fine detritus left on the surface
- Organic growth not fully removed
- Oil contamination not treated
- Applying a new sealer over an incompatible older coating
The fix is usually not “apply more sealer”. It is removal (where possible), proper cleaning, and reapplication in controlled conditions. Test patches matter here.
Patchiness and Roller Marks
Patchiness usually comes from inconsistent absorption or inconsistent application thickness. Prevent it by:
- Using a consistent roller and working in a defined pattern
- Avoiding stopping mid-panel or mid-strip
- Maintaining a wet edge so overlaps blend invisibly
- Not overloading the roller and creating puddles
Slippery Finish
Driveways get wet. If your sealer creates a smoother surface, traction can change. Manage slip risk by choosing appropriate finishes, considering anti-slip systems where compatible, and avoiding heavy gloss on slopes and shaded areas.
What to Buy and Where to Get It
For a successful DIY seal, think in systems: clean, repair, seal, maintain. Buying “just a tin of sealer” is how most DIY jobs go wrong, because the surface is rarely ready for sealing without supporting products and tools.
Core Basket (Works for Most Driveway Types)
- Cleaner: A driveway-appropriate cleaner to remove algae, dirt and traffic film.
- Degreaser (as needed): For oil spots and vehicle drip areas.
- Sealer matched to your surface: Block paving sealer, tarmac restorer/sealcoat, or concrete sealer, chosen for your finish and performance needs.
- Application kit: Roller, tray/scuttle, brush for edges. For some tarmac products, a squeegee may be preferred.
- Protection kit: Tape, sheeting, warning markers.
- PPE: Gloves and eye protection as a baseline, plus anything specified on the product’s SDS/label.
Block Paving Add-Ons (Often Essential)
- Kiln-dried jointing sand: If cleaning has reduced joint fill, re-sand before sealing.
- Joint-focused sealer (optional): If your goal is to stabilise joints and reduce sand loss, choose a system designed for that.
Where to Get It
To build a compatible basket quickly, start with our main category hubs and choose products based on your surface type:
- Path, patio and driveway products for a broad category overview.
- Patio, path and driveway sealers to choose sealers by use case and finish.
- Paving, path and road products for related cleaners and surface protection items.
- Contractors and professional tools for rollers, prep tools and site-ready accessories.
- Cleaning and surface preparation to support the prep stage that determines whether sealing succeeds.
If you want a shorter selection overview before you buy, see our guide on choosing the right patio and driveway sealer .
Summary
A reliable DIY driveway sealing result comes from process discipline, not luck with the weather. Identify the surface, choose a compatible sealer and finish, then prioritise preparation: remove organic growth, contamination and loose material, repair what sealing cannot fix, and confirm deep dryness (especially in block paving joints). Apply in thin, even coats, maintain a wet edge, and protect the surface through curing. If you follow that sequence and build a complete clean-repair-seal basket, rather than buying sealer alone, you dramatically reduce the risk of clouding, peeling and patchiness.
Frequently Asked Questions
Do I need to seal block paving?
Not always. Seal if you want easier cleaning, stronger colour and potentially better joint stability. If joints are low, re-sand first. Joint performance depends on correct sanding and full dryness.
How long should I wait after cleaning before sealing?
Long enough for the surface and, crucially, the joints and upper layers to be completely dry. Conservative planning helps, especially in cool or damp UK conditions.
Can I seal new block paving straight away?
Many guides recommend allowing new paving to weather in for a period and topping up sand joints after initial settlement. New block paving is often left to settle before sealing.
Do I need a safety data sheet for driveway sealer?
You should read it. Safety data sheets support a risk assessment and include information on handling, storage and emergency measures. See HSE guidance on chemical safety data sheets.
Is it better to touch up tarmac in patches or coat the whole drive?
Many cover-up style products look best when applied over the whole area. Patch applications often appear uneven, whereas full coverage usually delivers a more consistent finish.
Why did my sealer go white or cloudy?
Moisture is a common cause, particularly if it wicks up from within the surface while the sealer is curing. Use a conservative dry-weather window and confirm deep dryness before applying.

Path & Patio is a UK supplier of paving and landscaping products, sharing practical guidance, product expertise and installation advice for patios, paths and driveway projects.