
How to Clean a Patio Safely: Pressure Washer vs Chemical Cleaner vs Manual Methods
This guide is built around one clear principle: safe patio cleaning is about avoiding surface damage and managing risk, not just improving appearance.
Quick answer: what is the safest way to clean a patio?
- For most UK patios, manual cleaning with brushing and controlled rinsing is the lowest-risk method.
- Chemical cleaners are best used for algae, moss and organic growth where brushing alone is not enough.
- Pressure washing should only be used on stable paving with sound joints, using low pressure and controlled technique.
Who this guide is for (and when it is not enough)
This guide is written for UK homeowners and DIY users who want to clean patios safely as part of routine maintenance. It focuses on low-risk methods, surface care and preventing damage during cleaning.
This guide is not intended to solve structural or installation problems, such as:
- Loose or rocking slabs
- Failing sub-bases or bedding layers
- Persistent standing water caused by incorrect falls or drainage
When to consider professional help
If your patio shows signs of movement, widespread joint failure, drainage issues, or you are dealing with high-value or sensitive natural stone you cannot risk damaging, professional assessment is usually the safer option.
Patio Cleaning Safety: What “Safe” Really Means
Three Safety Outcomes to Aim For
A safe patio clean delivers three outcomes at the same time:
- People safety: reduce slip risk, avoid chemical exposure, and control debris and spray so children, pets and neighbours are not put at risk.
- Surface safety: remove dirt and growth without damaging the paving face, edges, joints, pointing, grout lines or any existing sealer.
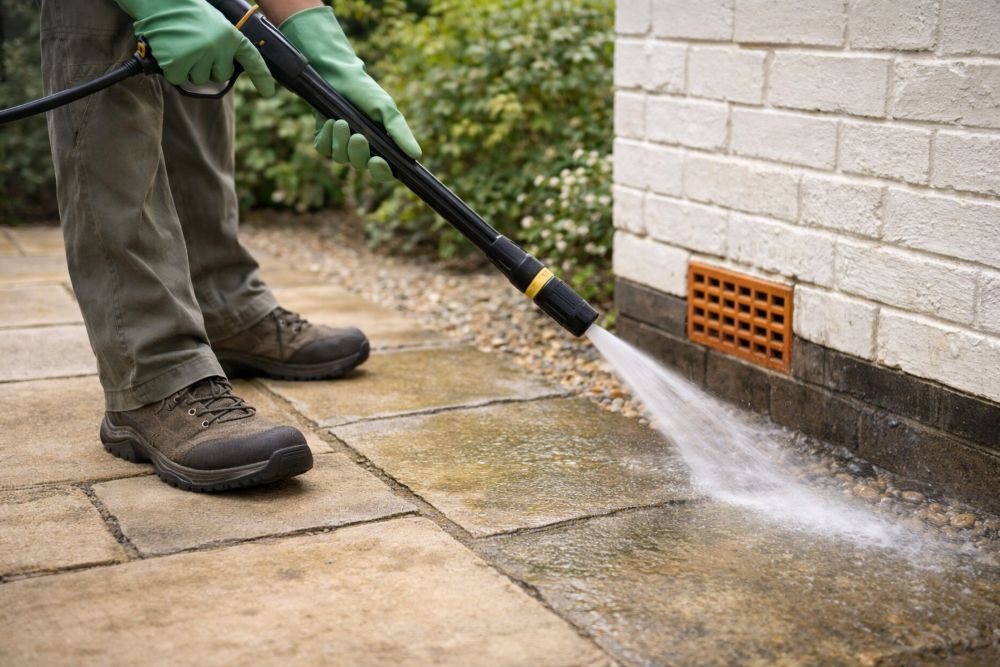
- Site safety: avoid pushing dirty water into places it should not go (for example, towards doors, air bricks, the base of walls, or into delicate borders).
If any of these outcomes is at risk, reassess before continuing. For many patios, the safest solution is not the fastest one.
What You Are Actually Cleaning
Patios typically collect a mix of:
- Organic growth: algae, moss and lichen, especially on north-facing, shaded or damp areas. These are the main drivers of “slippery patio” complaints.
- General grime: airborne dirt, traffic marks, leaf tannins, bird droppings, barbecue grease and soil washed in from beds.
- Joint contamination: sand-filled joints that accumulate detritus, support weed seeds, and darken over time.
- Specific stains: rust, oil, fertiliser, cement residue or tannin staining from planters and timber furniture.
A useful mental model is: organic growth and grime are different problems, and they often need different tools. Scrubbing is mechanical. Chemicals are reactive. Pressure washing is force. Each has a place, but each can go wrong.
When Not to DIY (Or When to Pause and Reassess)
Stop and rethink if any of the following are true:
- Your paving is loose, rocking, or sinking. Cleaning will not fix the underlying bedding issue and may make it worse.
- Joints are already empty or crumbling. A pressure washer will strip them further, and even aggressive brushing can open them up.
- The patio has an unknown stone type (especially if you suspect limestone) and you were about to use an acidic cleaner.
- Drainage is poor and water sits for hours. Cleaning will temporarily improve grip but can worsen damp-related issues if water is forced into edges and corners.
- You have heavy black mould-like staining and are considering stronger treatments. Use one product as directed, or switch to a different approach.
If you need supplies for the job (cleaners, tools, jointing products or sealers), keep your selection aligned with your surface type. Browsing a single, relevant category such as patio and driveway products is usually safer than jumping between random product types with unclear compatibility.
Identify Your Patio Before You Clean
Material Check: What Is Your Patio Made From?
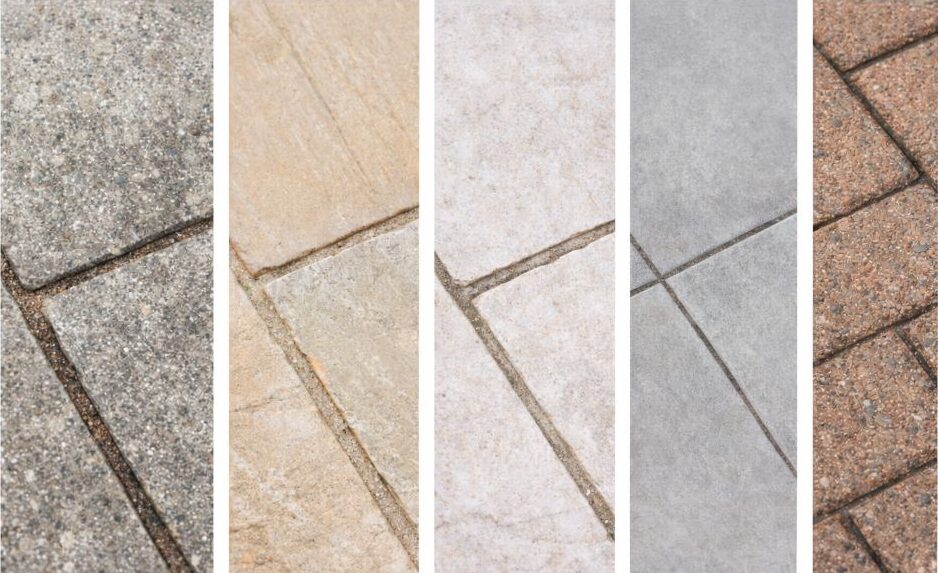
Your first decision is the paving material. Cleaning methods that are “fine” on one surface can cause permanent damage on another. Use this quick check:
- Concrete flags (wet cast or pressed): common in UK gardens. Can be marked by aggressive pressure washing and can be sensitive to harsh chemical treatments on some finishes.
- Sandstone: popular, often slightly textured. Variable response to stronger chemicals. Can be damaged by very high pressure or aggressive nozzles.
- Limestone: smooth to lightly textured and often pale. Particularly important: acid-based cleaners should be avoided on limestone.
- Porcelain: typically lower porosity and easier to keep clean, but grout lines and jointing still need care.
- Block paving: small blocks with sand-filled joints. Pressure washing can remove jointing sand and needs a proper “after” step.
- Previously sealed paving: may have a sheen or “beading” when water hits it. The wrong cleaner can dull, patch or strip the coating.
If you are unsure, assume it is a more delicate surface and start with the gentlest method. You can always escalate later.
Joint Check: What Holds the Patio Together?
Most patio damage during cleaning happens in the joints, not the slab face. Identify your joint type:
- Sand-filled joints: common with block paving and some slab patios. These are the easiest to disturb and the most likely to need topping up after pressure washing.
- Mortar joints: older slab patios often have cement mortar pointing. Mortar can crack over time and water can lift weak sections.
- Resin or compound joints: modern brush-in jointing systems can resist weeds well when installed correctly, but they can still be damaged by very aggressive pressure washing at close range.
- Grout lines (porcelain): narrow joints that can trap dirt and need careful, targeted cleaning rather than brute force.
If you already know the joints need work, plan that into your clean. You may want to line up what you need from patio and driveway pointing before you start, so you are not left with an exposed joint system after cleaning.
Site Check: Drainage and Nearby Risk Areas
A patio clean often involves a lot of water. Before you pick a method, look at:
- Drainage direction: where will the dirty water go, and will it sit against walls or thresholds?
- Adjacent planting: splashes of stronger cleaners can damage leaves and lawns. You need a plan to wet down and rinse.
- Nearby surfaces: painted timber, composite decking, metal furniture, and rendered walls can all be affected by splashes.
- Air bricks and vents: avoid driving water into these. Keep pressure washing and rinsing flows directed away from the house.
If drainage is poor, favour manual cleaning or controlled chemical cleaning with minimal rinsing, rather than flooding the surface.
Choose the Right Method (Fast Decision Framework)
The 60-Second Decision Tree
- Is the patio slippery from algae or moss? Start with brushing and scraping. If growth is established, use a dedicated cleaner or a careful, low-aggression pressure wash.
- Are joints already weak, empty, or crumbling? Avoid pressure washing. Use manual or chemical methods and plan joint repairs.
- Is the patio limestone (or possibly limestone)? Avoid acid-based cleaners. Use manual cleaning and a suitable non-acidic cleaner if needed.
- Is the staining oil or grease? Use a targeted stain remover or degreaser. Pressure washing alone often spreads it.
- Is the patio generally dirty, but stable and well-jointed? Manual cleaning may be enough. If not, a mild patio cleaner plus light agitation is usually safer than “full power” jetting.
Method Comparison (What to Use When)
| Method | Best for | Main risks | Surface impact | Typical follow-up |
|---|---|---|---|---|
| Manual (brush + water) | Light grime, routine maintenance, sensitive surfaces | Time and effort, may not shift deep staining | Lowest risk when done sensibly | None, or spot treatment |
| Chemical cleaner | Organic growth, deeper grime, targeted stains | Incorrect product choice, poor dilution, overspray to plants | Low to medium risk (depends on product and surface) | Rinse control, possible repeat application |
| Pressure washer | Fast removal of surface grime and growth on stable paving | Joint loss, surface marking, edging damage, driving water where it should not go | Medium to high risk if misused | Refill joints, dry time, possible re-point or seal |
Special Cases That Change the Answer
- New pointing or fresh jointing: avoid pressure washing until fully cured and stable. Start with brushing and light rinsing.
- Wet cast concrete or decorative finishes: patch test any aggressive method. Marking can be permanent.
- Sealed patios: your goal is usually “clean without stripping the sealer”. Avoid harsh chemicals and high pressure.
- Very heavy growth: consider a chemical pre-treatment to reduce the pressure you need to apply later.
Set Up for Safety (Non-Negotiables)
PPE and Controlling the Area
Patio cleaning creates slip risk, flying grit and chemical splash potential. At minimum:
- Wear eye protection (especially if pressure washing or using sprays).
- Wear gloves suitable for the product you are using.
- Wear footwear with grip, not smooth soles.
- Keep children and pets away until the area is rinsed and dry.
If you are using a pressure washer, treat the work area like a short-term exclusion zone. The goal is to prevent anyone walking into spray, debris, or a high-slip surface.
Chemical Safety: Label-First, Never “Mix”
The safest rule is simple: use one product at a time, exactly as directed. Do not combine cleaners. Chlorine-based products should not be mixed with other chemicals such as acids or ammonia-based cleaners because hazardous gases can be produced.
If you are tempted to use bleach because it “seems stronger”, read the safety implications first and do not improvise mixtures. A reliable reference is the public health guidance on sodium hypochlorite (the active ingredient in many bleaches) on GOV.UK.
Practical setup that reduces risk:
- Work outdoors with good airflow and avoid leaning into spray mist.
- Mix or dilute products in cold water unless the label tells you otherwise.
- Use a dedicated watering can or sprayer that you do not re-purpose for food or plants later.
- Rinse equipment well and store chemicals in original containers with intact labels.
Run-Off Control and Protecting Plants
Most patio cleaning failures are “side effects” rather than the cleaning itself. Protect the surrounding area first:
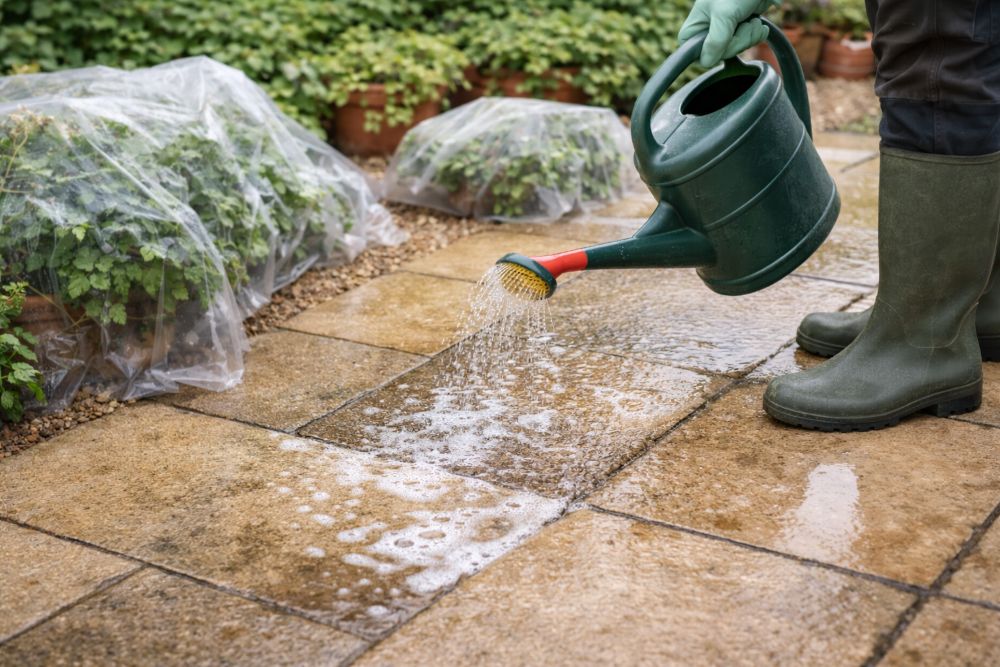
- Wet down nearby lawns and borders before applying chemicals. This reduces absorption if there is light overspray.
- Rinse plants afterwards with clean water.
- Do not let dirty water pool against the house wall. Redirect the rinse flow away from thresholds and vents.
- Work in sections so you can control where the water and residue go.
For cleaning products that are designed for patios and masonry, a focused category such as brick, masonry and patio cleaners makes it easier to stay within “intended use” rather than guessing with general household chemicals.
Manual Cleaning Method (Lowest Risk Baseline)
Tools and Materials Checklist
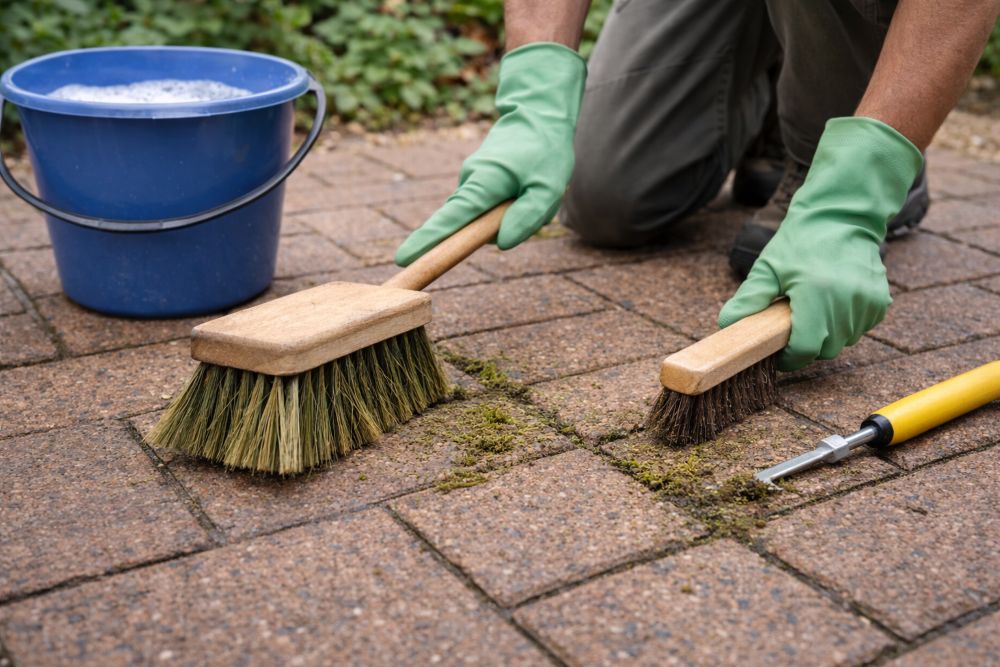
Manual cleaning is slower, but it is the best starting point for most patios because it is controllable. Typical kit:
- Stiff outdoor broom
- Hand brush for edges and corners
- Plastic scraper or patio weeding tool for joints
- Bucket, warm water, and a mild detergent (or a purpose-made patio cleaner used at the lightest effective dilution)
- Garden hose with a spray nozzle for controlled rinsing
If you need brushes, scrapers or general outdoor cleaning tools, use a relevant category such as garden tools and equipment so you can match tool stiffness and size to the job without improvising.
Step-by-Step: Sweep, Pre-Wet, Scrub, Rinse, Dry
- Dry sweep thoroughly. Remove loose dirt, leaves and grit. This prevents you from turning “mud” into a smear.
- Clear the joints. Use a pointed tool to remove moss from cracks. Do this before wetting the patio so you can remove debris rather than pushing it into joints.
- Pre-wet the surface. Lightly wet the patio. This helps detergents spread and reduces absorption on more porous stone.
- Scrub in sections. Work one small zone at a time. Use a stiff broom for the main field, and a hand brush for edges.
- Controlled rinse. Rinse the section before moving on. Do not flood the patio. Guide rinse water away from the house and sensitive borders.
- Inspect while wet. Many stains look different once rinsed. Identify areas that need a second scrub or targeted treatment.
- Dry and reassess. Let the surface dry. Decide whether the remaining marks need a chemical spot treatment, or whether “good enough” is the safer finish.
When Manual Cleaning Is Enough (and How to Keep It That Way)
Manual cleaning is often enough when the patio is generally dirty but not deeply stained. The key is frequency. A light sweep and occasional scrub stops organic growth taking hold.
Chemical Cleaning Method for Algae and Moss on Hard Surfaces (Targeted Results with Controlled Risk)
Cleaner Types: Match the Product to the Problem
Chemical cleaning is safest when it is targeted. Different problems need different chemistry, and using the wrong product is a common cause of surface damage. Typical categories include:
- Organic growth removers: designed to tackle algae, mould and green growth. Often effective with little scrubbing, but they still need careful handling and rinse control.
- General patio cleaners: aimed at everyday grime and traffic marks. Often the right “middle ground” if manual cleaning is not enough.
- Stain removers: oil, rust, tannin or cement residue treatments. These are usually best as a localised spot treatment, not a whole-patio wash.
- Acid-based cleaners: used for some stubborn stains, but material compatibility is critical. This is where most DIY damage happens.
A practical approach is to start with the least aggressive option that is intended for your surface type, then escalate only if needed.
Step-by-Step Chemical Cleaning (Safe Sequence)
- Read the label and confirm compatibility. Do not assume a product that works on concrete is safe for limestone, or that a masonry cleaner is safe on sealed surfaces.
- Protect the area. Remove furniture and pots. Wet down surrounding planting. Close doors and windows near the work area.
- Patch test first. Choose an inconspicuous corner. Apply as directed, wait the full recommended dwell time, then rinse. Allow it to dry fully before judging the result.
- Pre-wet the patio if advised. Many products work better when the surface is damp, and it can reduce absorption into porous stone.
- Apply evenly and sparingly. Use a watering can or pump sprayer for controlled coverage. Avoid overspray and avoid pooling.
- Respect dwell time. Do not let products dry out on the surface unless the label states a “drying” action is intended. Work in manageable sections.
- Light agitation where needed. A stiff broom often makes the difference without needing stronger chemicals.
- Rinse thoroughly. Rinse the section before moving on. Keep rinse water directed away from planted borders and the house.
- Repeat only where needed. A second controlled application in problem areas is usually safer than doubling concentration.
Material Cautions: Acids and Sensitive Stone
If you use acid-based cleaners, be strict about compatibility. Limestone and marble should not be cleaned with acid-based cleaners. More generally, natural stone varies and should be tested first. The safest policy is:
- Only use acid-based products if you know the patio material and the product is stated as compatible.
- Keep the treatment local, not blanket-applied.
- Rinse thoroughly and do not re-apply “just in case”.
If you do not know the stone type, treat it as sensitive and use manual cleaning plus a compatible general patio cleaner rather than acids.
Pets, Planting and Disposal Basics
Even when a product is marketed as “outdoor safe”, safe use still depends on how you apply and rinse it. Practical rules:
- Keep pets off the area during application, dwell time, and rinsing.
- Rinse surrounding plants after cleaning.
- Do not concentrate runoff into borders. Spread and dilute with water where possible.
- Store leftovers safely and do not pour concentrated chemicals into drains unless the product instructions explicitly permit it.
For broader seasonal maintenance and care routines (not just cleaning), the category garden care and maintenance is a better fit than improvising with indoor products.
Pressure Washer Method (Fast, but Easiest to Damage Things)
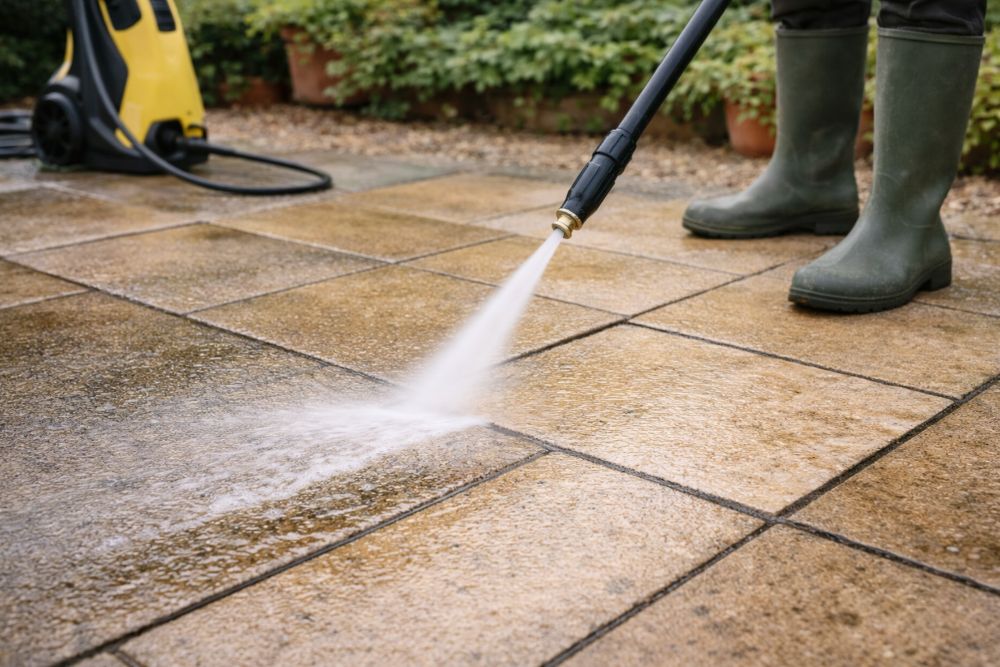
First, a Reality Check: Treat Pressure Washing as a Hazardous Tool
A pressure washer is a powered tool and should be treated as such. The safest approach is to treat the work area as controlled, use the minimum effective pressure, and prioritise technique over force.
Choosing the Right Setup (and What to Avoid)
The safest pressure washing setup for patios is one that stabilises output and reduces “point impact”:
- Use controlled pressure: start low, increase only if the surface can take it.
- Consider a surface cleaner attachment: it can reduce striping and helps keep the spray contained.
- Avoid the most aggressive nozzles on delicate paving: rotating or “turbo” patterns can gouge softer stone and strip joints quickly.
- Plan for accessories and safe handling: if you need hoses, connectors, or general work kit, a broad category like contractor tools is more relevant than mixing unrelated items.
Technique: Angle, Distance and Pass Pattern
Technique is the difference between “clean patio” and “damaged patio”. Key rules:
- Never aim straight down. Directing the lance straight down increases joint loss and surface marking risk.
- Use a shallow angle. Keep the lance at a shallow angle and work across the surface, not into it.
- Keep moving. Do not hold the jet on one spot. That is how you get stripes, etching, or pitting.
- Work diagonally across joints. This reduces the chance of stripping jointing material.
- Clean from the highest point down. This helps control runoff and keeps your “clean water” from flowing over dirty sections.
A practical workflow is: pre-wet, do a small test area, then clean in overlapping passes with consistent speed. If you see joints emptying or the surface marking, stop and switch method.
Protecting Joints (the Part Most People Forget)
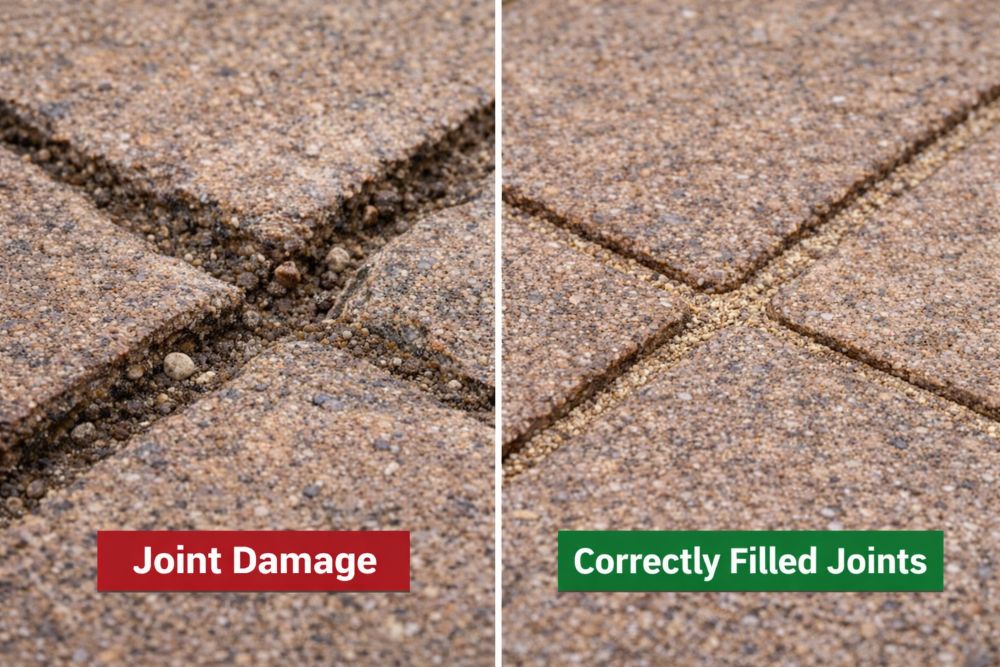
If your patio has sand-filled joints or block paving, assume the pressure washer will disturb the top layer. That is normal. What matters is the next step.
- Clean the surface. Use the lowest effective pressure and correct angle.
- Rinse and remove debris from joints. Do not leave grit and sludge in the joints.
- Allow to dry fully. Jointing products and sand need a dry substrate.
- Refill joints where needed. Top up and compact joint material as appropriate for your system.
If you know your joints will need topping up or repair, plan it in and use suitable products from patio and driveway pointing products. A “clean” patio with empty joints is not a safe or durable finish.
When to Stop Pressure Washing and Switch Approach
Stop pressure washing and switch to chemical or manual cleaning if:
- You see sand or jointing compound washing out quickly.
- The patio surface is visibly marking or changing texture.
- Dirty water is flooding towards the house or pooling with no escape.
- The area is heavily shaded and organic growth returns quickly (pressure washing alone will not change the conditions that caused the growth).
After-Cleaning: Reset the Patio so It Stays Clean
Re-Sand, Repair and Tidy the Edges
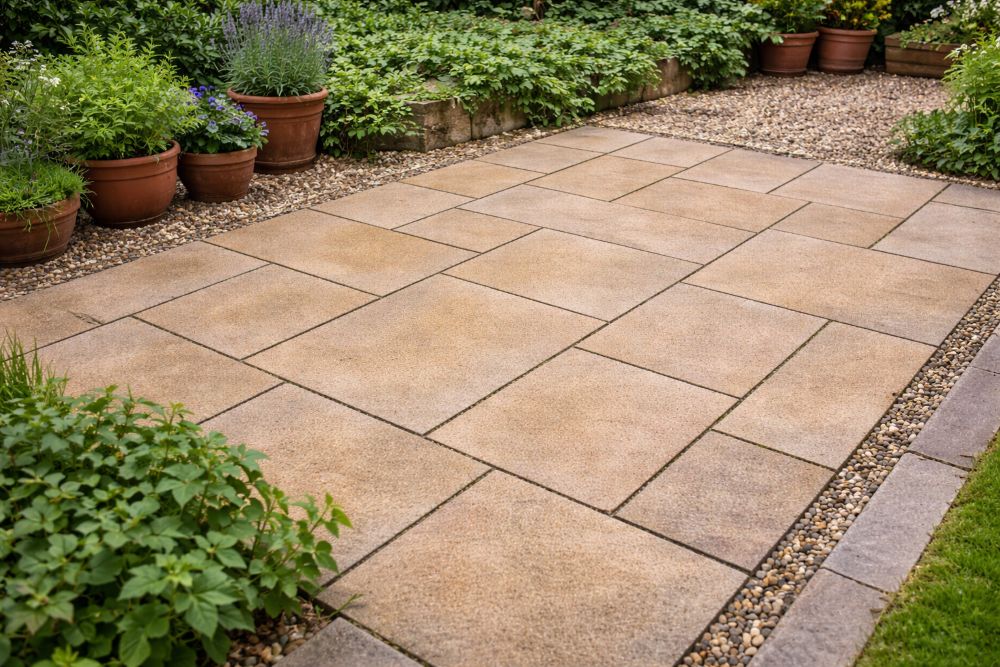
Once the patio is clean and dry, do a short “reset”:
- Inspect joints. If material is missing, refill it before the next rain event.
- Check edges and steps. Cleaning sometimes reveals loose edging that needs attention.
- Clear nearby drainage channels and gullies so the next rainfall does not drag dirt back onto the patio.
If you are planning bigger surface work (replacing damaged areas or refreshing paving), a broader browse of paving, path and road products is more efficient than piecemeal fixes.
Sealing: When It Makes Sense, When It Does Not, and How Long to Wait
Sealing is not mandatory, but it can make sense if your patio is porous, stains easily, or you want to reduce ongoing algae and grime retention. The key point is timing: do not seal a damp substrate, and do not seal while joints are empty.
If you are considering sealing, start by understanding sealer types and compatibility, then choose products that match your surface. Two practical next steps:
- Read the guide to patio and driveway sealers to choose the right sealer type for your material and use-case.
- Browse patio and driveway sealing products once you are confident about compatibility.
A Simple UK Seasonal Maintenance Plan
- Spring: sweep weekly during heavy pollen and soil movement, spot-treat algae early, and check joints after winter.
- Summer: manage barbecue grease quickly, rinse after garden projects, and avoid harsh cleaning during extreme heat when products can dry too fast.
- Autumn: keep leaves off the patio. Leaf tannins stain and damp shade encourages algae growth.
- Winter: prioritise slip safety. Avoid aggressive cleaning during freezing conditions. Remove debris and keep drainage routes clear.
Common Mistakes and Troubleshooting
Mistakes That Cause Damage
- Going straight to maximum pressure. Start low, increase only if needed.
- Cleaning without a joint plan. If joints are disturbed, refill them. Leaving them empty reduces durability.
- Using acid on unknown stone. If you do not know the surface, do not gamble.
- Letting chemicals dry on the surface. Many products stain or bleach unevenly if they dry out.
- Cleaning in one huge session. Work in sections so you can control dwell times, runoff and rinsing.
- Ignoring the cause of growth. Shade, poor airflow and standing water drive algae return. Cleaning without addressing conditions is short-lived.
Quick Fixes for Common Issues
- Streaks after pressure washing: usually inconsistent distance or speed. Re-clean using a consistent pass pattern, or switch to a surface cleaner attachment.
- Patchy colour after chemical cleaning: often uneven dwell time. Apply evenly in smaller sections and rinse thoroughly.
- White residue: could be leftover product or mineral deposits. Rinse more thoroughly and avoid reapplying stronger products until you know the cause.
- Green return within weeks: improve airflow (pruning), reduce shade where possible, and adopt regular brushing to discourage regrowth.
When Professional Help Is the Right Call
Consider professional help if you have persistent staining you cannot identify, high-value natural stone you cannot risk damaging, significant drainage issues, or structural movement in the patio. A good professional will start with surface identification and a test patch, not with maximum pressure.
Summary
Safe patio cleaning is a method choice, not a product choice. Identify the patio material and joints first, then start with the lowest-risk approach that can achieve your goal. Manual cleaning is the safest baseline. Chemical cleaning is safest when it is targeted, label-led and tested in a small area first. Pressure washing can be effective, but it should be treated as a controlled tool: shallow angle, keep moving, and plan to refill joints afterwards.
If you want the patio to stay cleaner for longer, your best investment is prevention: regular sweeping, stopping shade and damp from dominating the surface, keeping joints in good condition, and considering sealing only when the surface is fully dry and properly prepared.
Frequently Asked Questions
Can I pressure wash any patio?
Not safely. If joints are weak, the surface is delicate (some concrete finishes and softer natural stone), or drainage is poor, pressure washing can cause more harm than good. Start with manual cleaning, then use a compatible patio cleaner if needed. If you do pressure wash, use low pressure first, shallow angle, and plan to refill joints afterwards.
Do patio cleaners work without scrubbing?
Some products designed for organic growth can be effective with minimal agitation, but results depend on the level of growth and how well you apply and rinse. Even when a product claims “no scrub”, light brushing often improves consistency and reduces the need for stronger chemistry.
Is bleach safe on patios?
Bleach can create serious safety risks if misused, especially if mixed with other cleaners. It can also affect surrounding plants and may not be compatible with all surfaces or finishes. If you choose to use any chlorine-based product, follow label instructions exactly and do not mix products.
How do I stop algae coming back?
Cleaning removes the growth, but prevention reduces the conditions that cause it: keep the patio swept, prune overhanging plants to improve light and airflow, reduce standing water, and focus on regular light maintenance rather than occasional aggressive cleaning.
Why did my joints wash out when I cleaned the patio?
High water force removes jointing sand and can dislodge weaker pointing. This is common with pressure washing on sand-filled joints. The fix is to allow the patio to dry, then refill joints with the correct jointing material for your system.
Should I seal the patio after cleaning?
Sealing can help on porous surfaces, but only when the patio is clean, fully dry, and joints are properly filled. Choose a sealer that matches your surface type and expected traffic, and follow the correct waiting period after cleaning before applying.

Path & Patio is a UK supplier of paving and landscaping products, sharing practical guidance, product expertise and installation advice for patios, paths and driveway projects.